If you want to do something (like creating a room, or sending a message) on Spark on behalf of someone else, you need to request permissions to the person by Spark OAuth function. This application provides you with a user interface (web) where the person can accept your request and send the generated token details to you. It allows you to define the access scope, client ID, client secret, log level, DB info, and super admin info in a configuration file (conf/config.json).
There is also a token management center which allows the application owner to manage (refresh/remove) tokens from database (mongodb), and manage(add/update/remove) an admin account.
Installation
To get started you will first need to have Node.js installed. Going to node.js, it will automatically detect your OS and offer the download link. After you get the installer, just double click it and follow the "next step" to complete the installation. For Linux OS, it provides Linux Binaries (.tar.gz) in both 32-bit and 64-bit. Download the .gz file to your machine and uncompress it, configure the PATH, then you can use it.
You also want a database (here we use mongodb) to store your tokens. Go to https://www.mongodb.org/ to download and install it in your local. Please do not forget setting environment variable (export PATH=my_mongodb_server_path/bin:$PATH in your Users/your_username/.bash_profile) so that your machine knows where to run "mongod" command to start mongodb server.
To install this sample to your local machine, you can either use NPM (Node Package Manager):
~$ npm install --save spark-oauth-sample
or download from here, then uncompress and place it into your project folder.
If you run into the below exception when installing (specifically for bcrypt) by NPM on Mac, please install higher version of GCC (or just download the project as there is already a set of bcrypt included). This is due to that the version of GCC Apple ships are 4.2 which is ancient, and Apple doesn't ship a newer version. You can either install a modern GCC from somewhere like Mac Ports (which is probably simpler and faster) or build it by yourself following the instructions at http://gcc.gnu.org/wiki/InstallingGCC. In this case, I used Macports to install GCC5 here.
cc1plus: error: unrecognized command line option "-std=gnu++0x"
make: *** [Release/obj.target/bcrypt_lib/src/blowfish.o] Error 1
gyp ERR! build error
gyp ERR! stack Error: `make` failed with exit code: 2
Configuration
- You will first need to create an application on "Spark For Developer" platform following the instructions. The redirect URL should be http://myserver.com/auth/spark/callback. If you want to test it on your local machine, you could use 127.0.0.1 (instead of localhost, since the Spark internal servers recognize IP better) and a port, i.e. http://127.0.0.1:3000/auth/spark/callback - Spark will send the code to the redirect URL, while we have service running there. If you want to run it over internet, then you need to configure an internet accessible URL, i.e. http://web1.tunnlr.com:12826/auth/spark/callback.
- After an application is created, you will see an unique client ID and a place to generate a client Secret ID in the "OAuth Settings" section.
- Go to the "conf" folder of this sample, open the config.json.
- Copy the client ID and paste it to the "clientID" field, and generate a client Secret then copy/paste it to the "clientSecret" field.
- Copy the redirect URL set in step 1 and paste to "redirectURIUnencoded" field.
- Encode the redirect URL in step 5 (from a tool, i.e. http://meyerweb.com/eric/tools/dencoder/), then fill the "redirectURI" field with the encoded redirect URL.
- Copy out the values of the scope from your application, use whitespace character to separate them if there are multiple values. For example, "spark:rooms_read spark:memberships_read spark:messages_read spark:people_read spark:memberships_write spark:messages_write spark:rooms_write"
- Encode the values (from a tool, i.e. http://meyerweb.com/eric/tools/dencoder/), then fill "scope" field with the encoded values. (please see the existing value of "scope" in config.json as sample if you have any problem/question)
- Change the "contactEmail" field to your email address (as the requester).
- You can change the 'state' field to a more secure string (i.e. a random UUID string), or keep it as it is just for testing (do not recommend using special characters).
- If you want to put the sample into a public address, then you will need to change the hostname 127.0.0.0 and port 3000 to the real IP/Port. If you test it in local, make sure you use 127.0.0.1 instead of localhost as hostname.
- The logLevel is for defining the levels (debug/error/fatal) of logs, which are used for troubleshooting.
- The "dbConfig" section is for configuring the ip, port, the name of the DB storing admin users and the name of DB storing tokens.
- The "superAdminAccount" section is for configuring the profile of the super admin account. It has the highest level permissions, like create/update/remove a normal admin account. Normal admin account can only refresh/remove tokens and update his/her own profile (except username).
- Save it, and the configuration is complete.
Running
If you download the project folder into your local, you just need to CD to the folder and run the below command.
node app.js
If you use NPM to install, the simplest way would be CD to /node_modules/spark-oauth-sample/ then run the above command.
Home page of starting requesting token:
http://host:port
Before you get into the admin center, you need to initialize the admin system (specifically initialize super admin account) by running the below link in browser (You will be automatically logged in as super admin user after initialization!)
http://host:port/admin/initialize
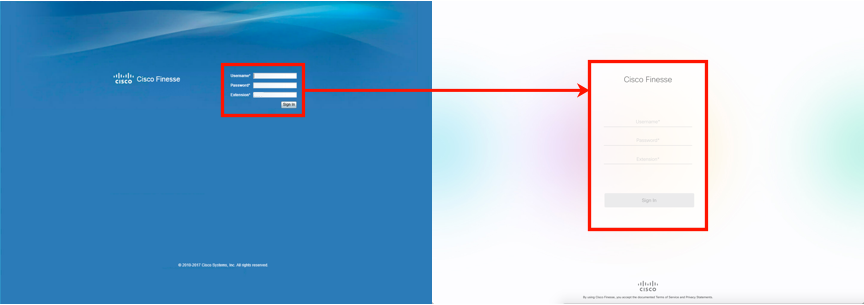
Admin login page:
http://host:port/admin/
This project is also published on Github.