 Previous ArticleNext Article
Contact lists come handy when you consistently collaborate with the same people. They provide an easy reference and selection when you need to enter or search for users within DCP. You can have contact lists with your regular peer contacts, your Cisco services delivery teams, ...
The easiest way to have contact lists is by asking your Cisco project manager to share Contact groups with you.
Once you have one or more Contact groups, you will be able to experience the advantages that comes with it :
- The list of contacts provide direct communication from their profile (embedded email).
- Throughout DCP, wherever you need to select users (e.g. when submitting a document for approval, start a discussion ...) you can use this contact list rather then searching and typing contacts over and over.
- You can also create your own contact reference list and (re-)group your contacts in contact-groups for easy selection of several contacts at once. This is explained in next article.
Contacts shared with you
As mentioned, the easiest way to get started with contact lists is by asking your Cisco project manager (or any other member of the team) to share Contact groups with you. To achieve this you need to be a member of a shared workview with your Cisco services delivery team. They will then have to create a contact group and 'pin' it to the shared workview. More details about pinning contact groups is provided later in this user guide.
Communicating with your contacts from within DCP
Once this is done, you will be able to start using the contact group and the contacts within.
To directly communicate with a contact, access your contact list in the Contact Management pane.
Click on the 'Contacts' icon from the DCP Control capabilities in the top-right corner of DCP. This will open the Contacts Management pane. The Contacts Management pane consists of a left and right column. The left column has two sections- 'Contact Groups' and 'Other Individual Contacts'. The right column lists the contacts within the selected item from the left column.
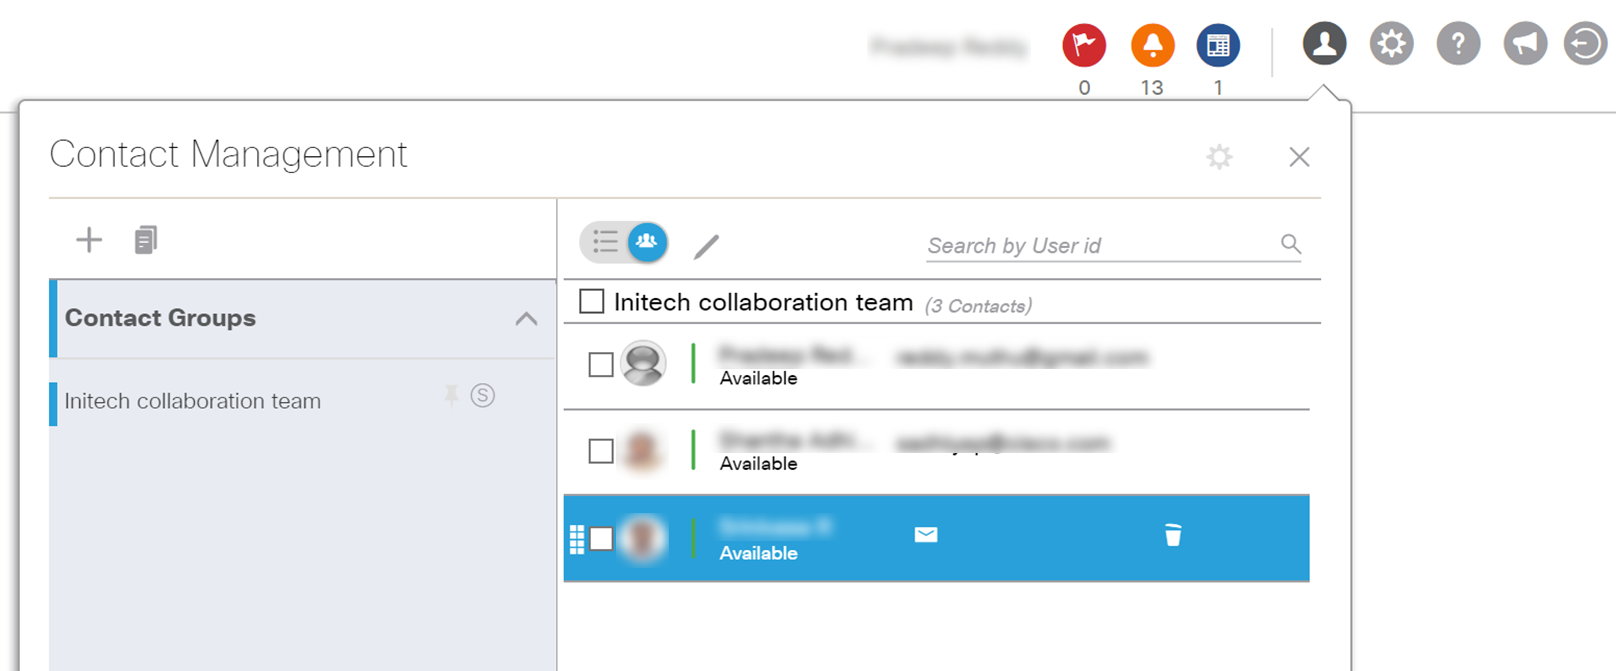
You can trigger a communication from the Contacts Management pane. Mouse over on a contact in the right column to reveal the email icon with embedded email address. Click on it to initiate an email writing. Other communication capabilities or limited to Cisco employees.
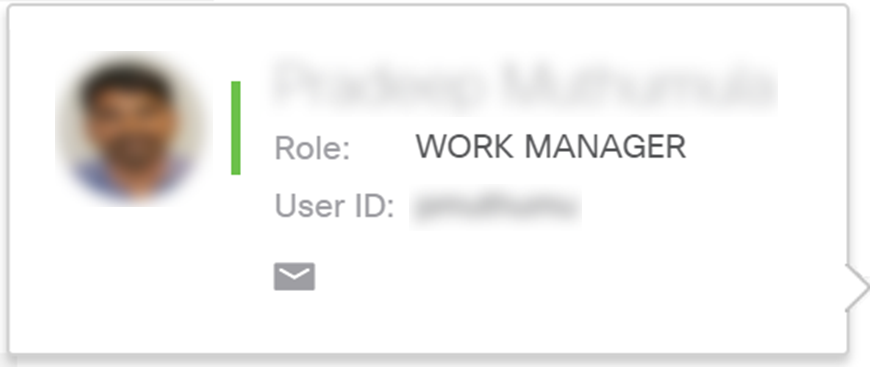
Note: Similarly, anywhere in DCP where a user is mentioned. Pause your cursor over the name (or user id) for more than 2 seconds and a profile card of the user will pop-up. The profile card includes at the bottom the same email communication capability.
Using your contacts in the User Selection component anywhere in DCP
Wherever you need to add users for a particular action or property definition (e.g. submit for approval, start a discussion ...) the same user-selection component is available to you.
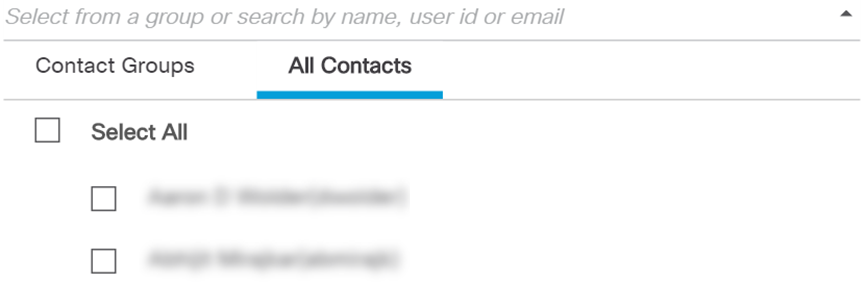
You can search for a user by user id, email address or name. Alternatively, rather than searching, you can also choose the person from your aggregated contact-list or from the contact-groups (contact-groups are explained in the next article).
Click the arrow-down, right from the search input field to expand your contact-list and contact-groups. Further expand the appropriate section and/or contact-group and select one or multiple persons at once. You can also select a contact-group as a whole. Click outside the user-selection component to effectively add the selected person.
Related articles :
Create Contact Groups
Pin Contact Groups
 Table of Content
 Previous ArticleNext Article