cancel
Showing results for 
Search instead for 
Did you mean: 
cancel
20851
Views
21
Helpful
7
Comments
aradford
Cisco Employee
Cisco Employee

Background

I have written a number of blogs on Network Plug and Play (PnP) on APIC-EM and wanted to provide an update of the new improved PnP in DNA Center.

This new series covers the changes and enhancements made to PnP on DNA Center 1.2.   The PnP application was not officially exposed in DNA Center 1.1.x The main changes in 1.2 include:

  • Flexible workflow to onboard devices (vs rigid two step process in the past).
  • Support for stacking and stack renumbering as part of a workflow
  • Reuse of DNA Center image repository (Part of software image management SWIM) vs standalone APIC-EM image repository.
  • Reuse of the DNA Center template engine vs standalone APIC-EM template library.
  • New API  - /api/v1/onboarding

This initial blog will cover the UI and workflow changes, and in the next blog I will cover the API changes.

Key Components

A PnP solution has three main components (and one optional one):

  1. An agent, which resides in the IOS software, that looks for a “Controller” when the device is first booted up.
  2. A PnP Server, which is an service running on DNA Center
  3. The PnP protocol, that allows the agent and the Controller to communicate.
  4. (optional) A cloud redirect server, for devices that cannot use DHCP or DNS to discover DNA Center.

images.jpg

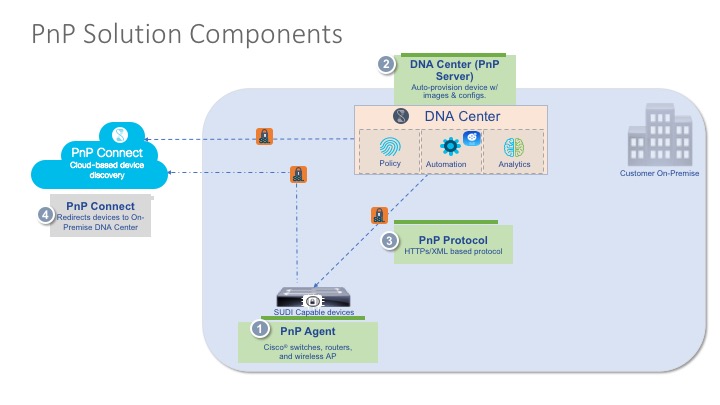
Discovering the Controller

The first thing that needs to happen is for the device to get in contact with the controller. There are four mechanisms you can use to make this work:

  1. DHCP server, using option 43 which is set to the IP Address of the controller
  2. DHCP server, using a DNS domain name.  The device will do a dns lookup of pnphelper.<your domain>
  3. Cloud redirection, which is currently in controlled availability
  4. USB key. This can be used for routers and remote devices, where some initial configuration of the WAN connection is required (e.g. MPLS configuration).

Getting Started – PnP App

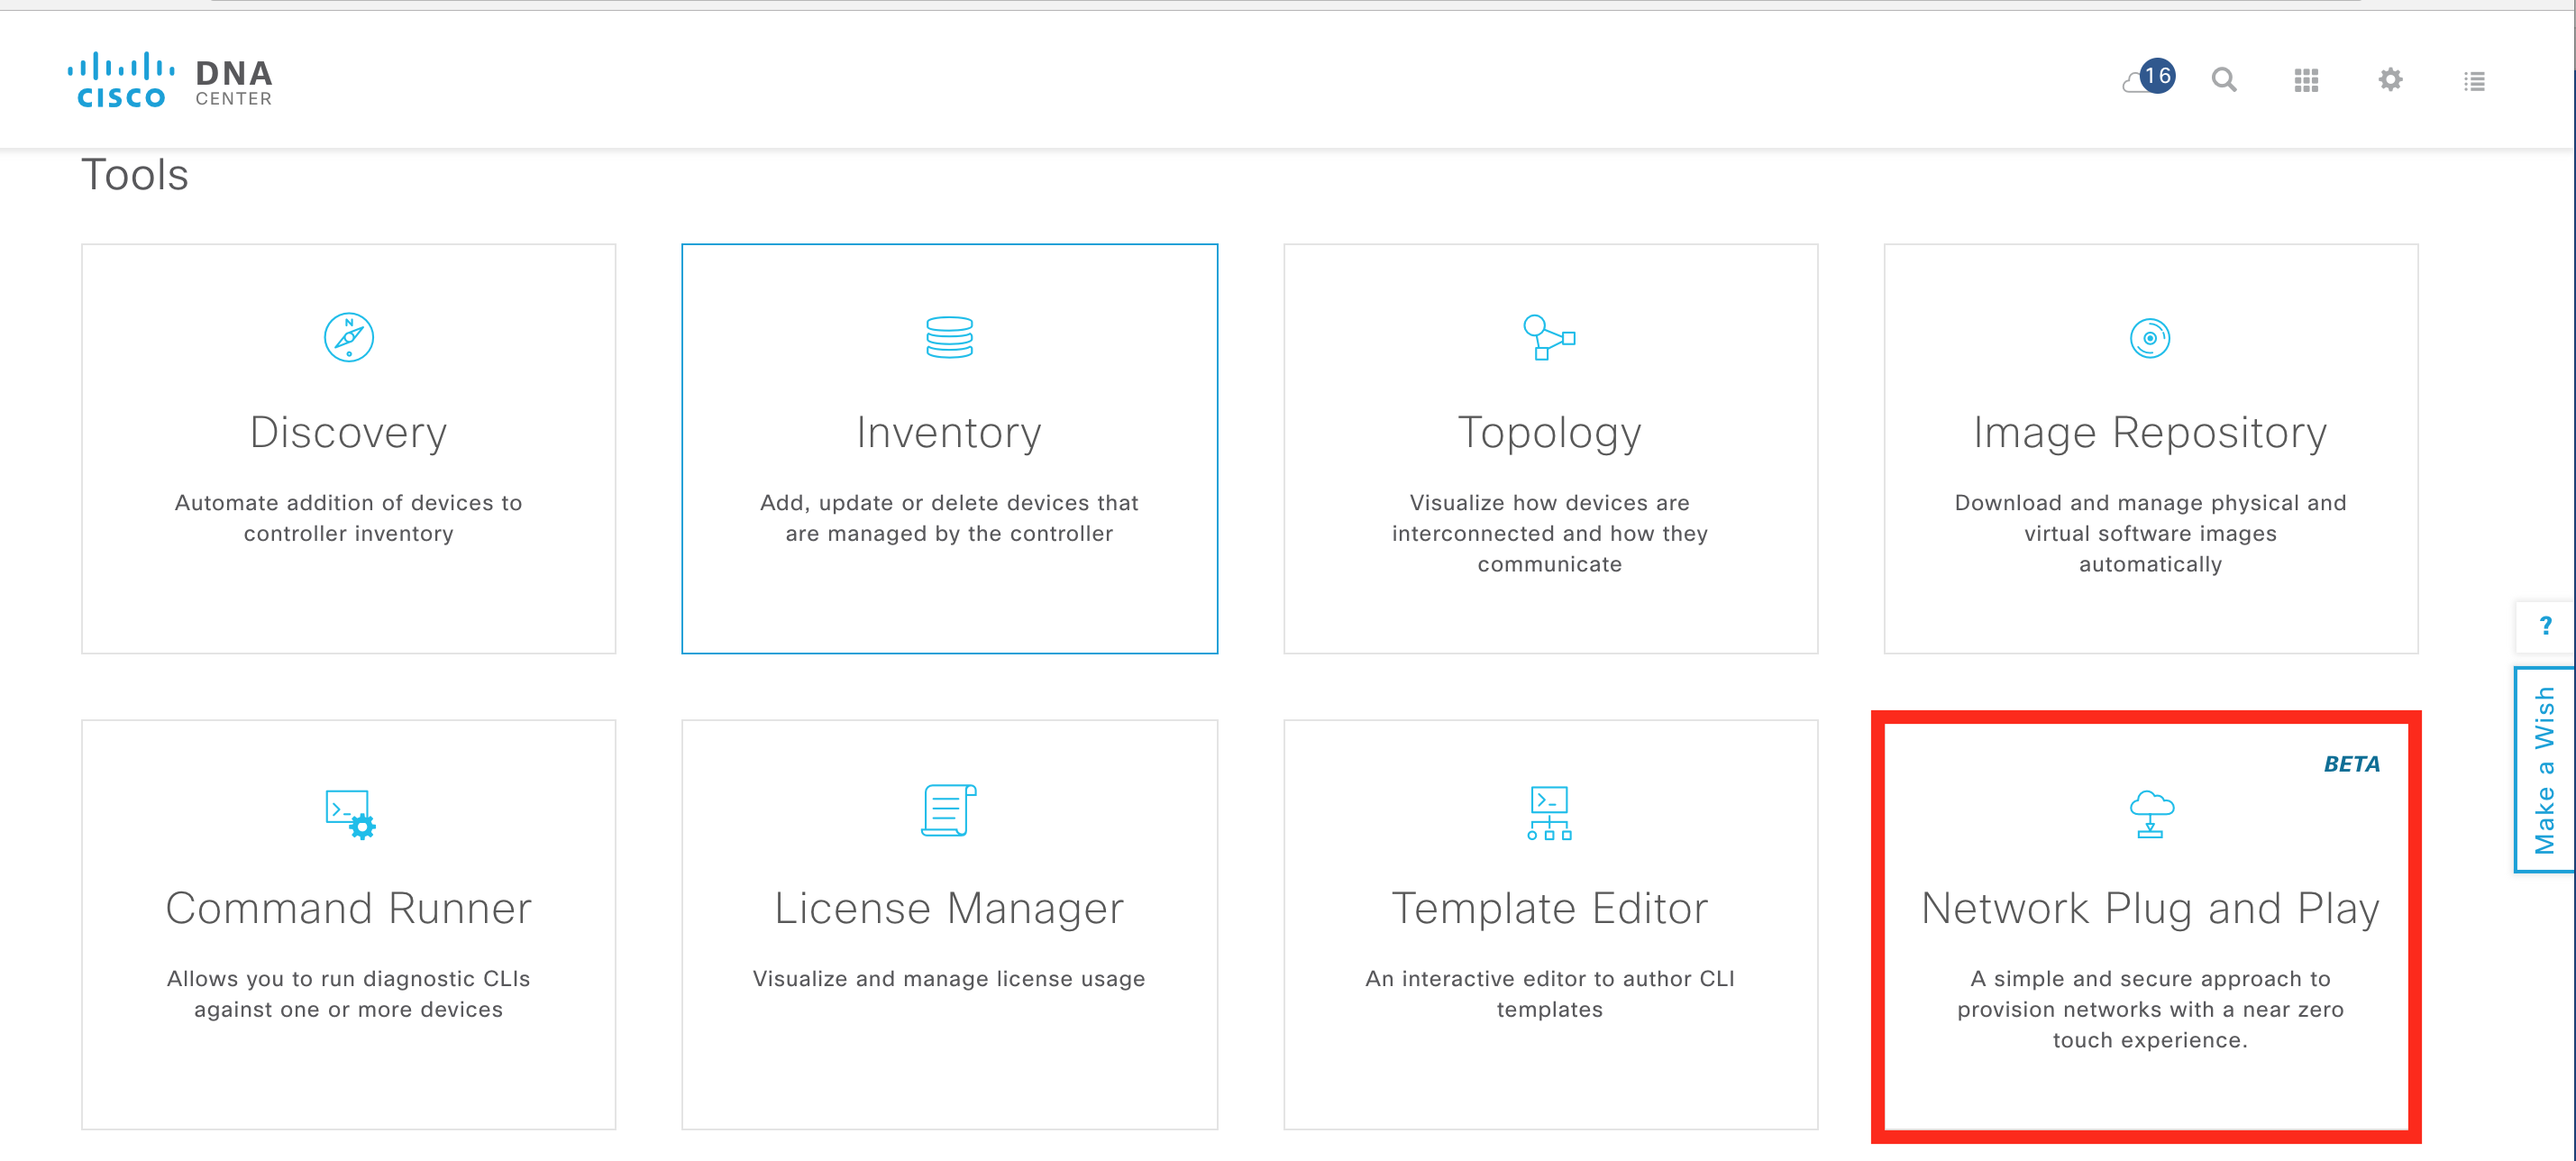
At present PnP is not integrated into the provisioning workflow, this will be done in the future. There is a standalone PnP app in the tools section.

PnP-App.png

Getting Started – Creating a workflow

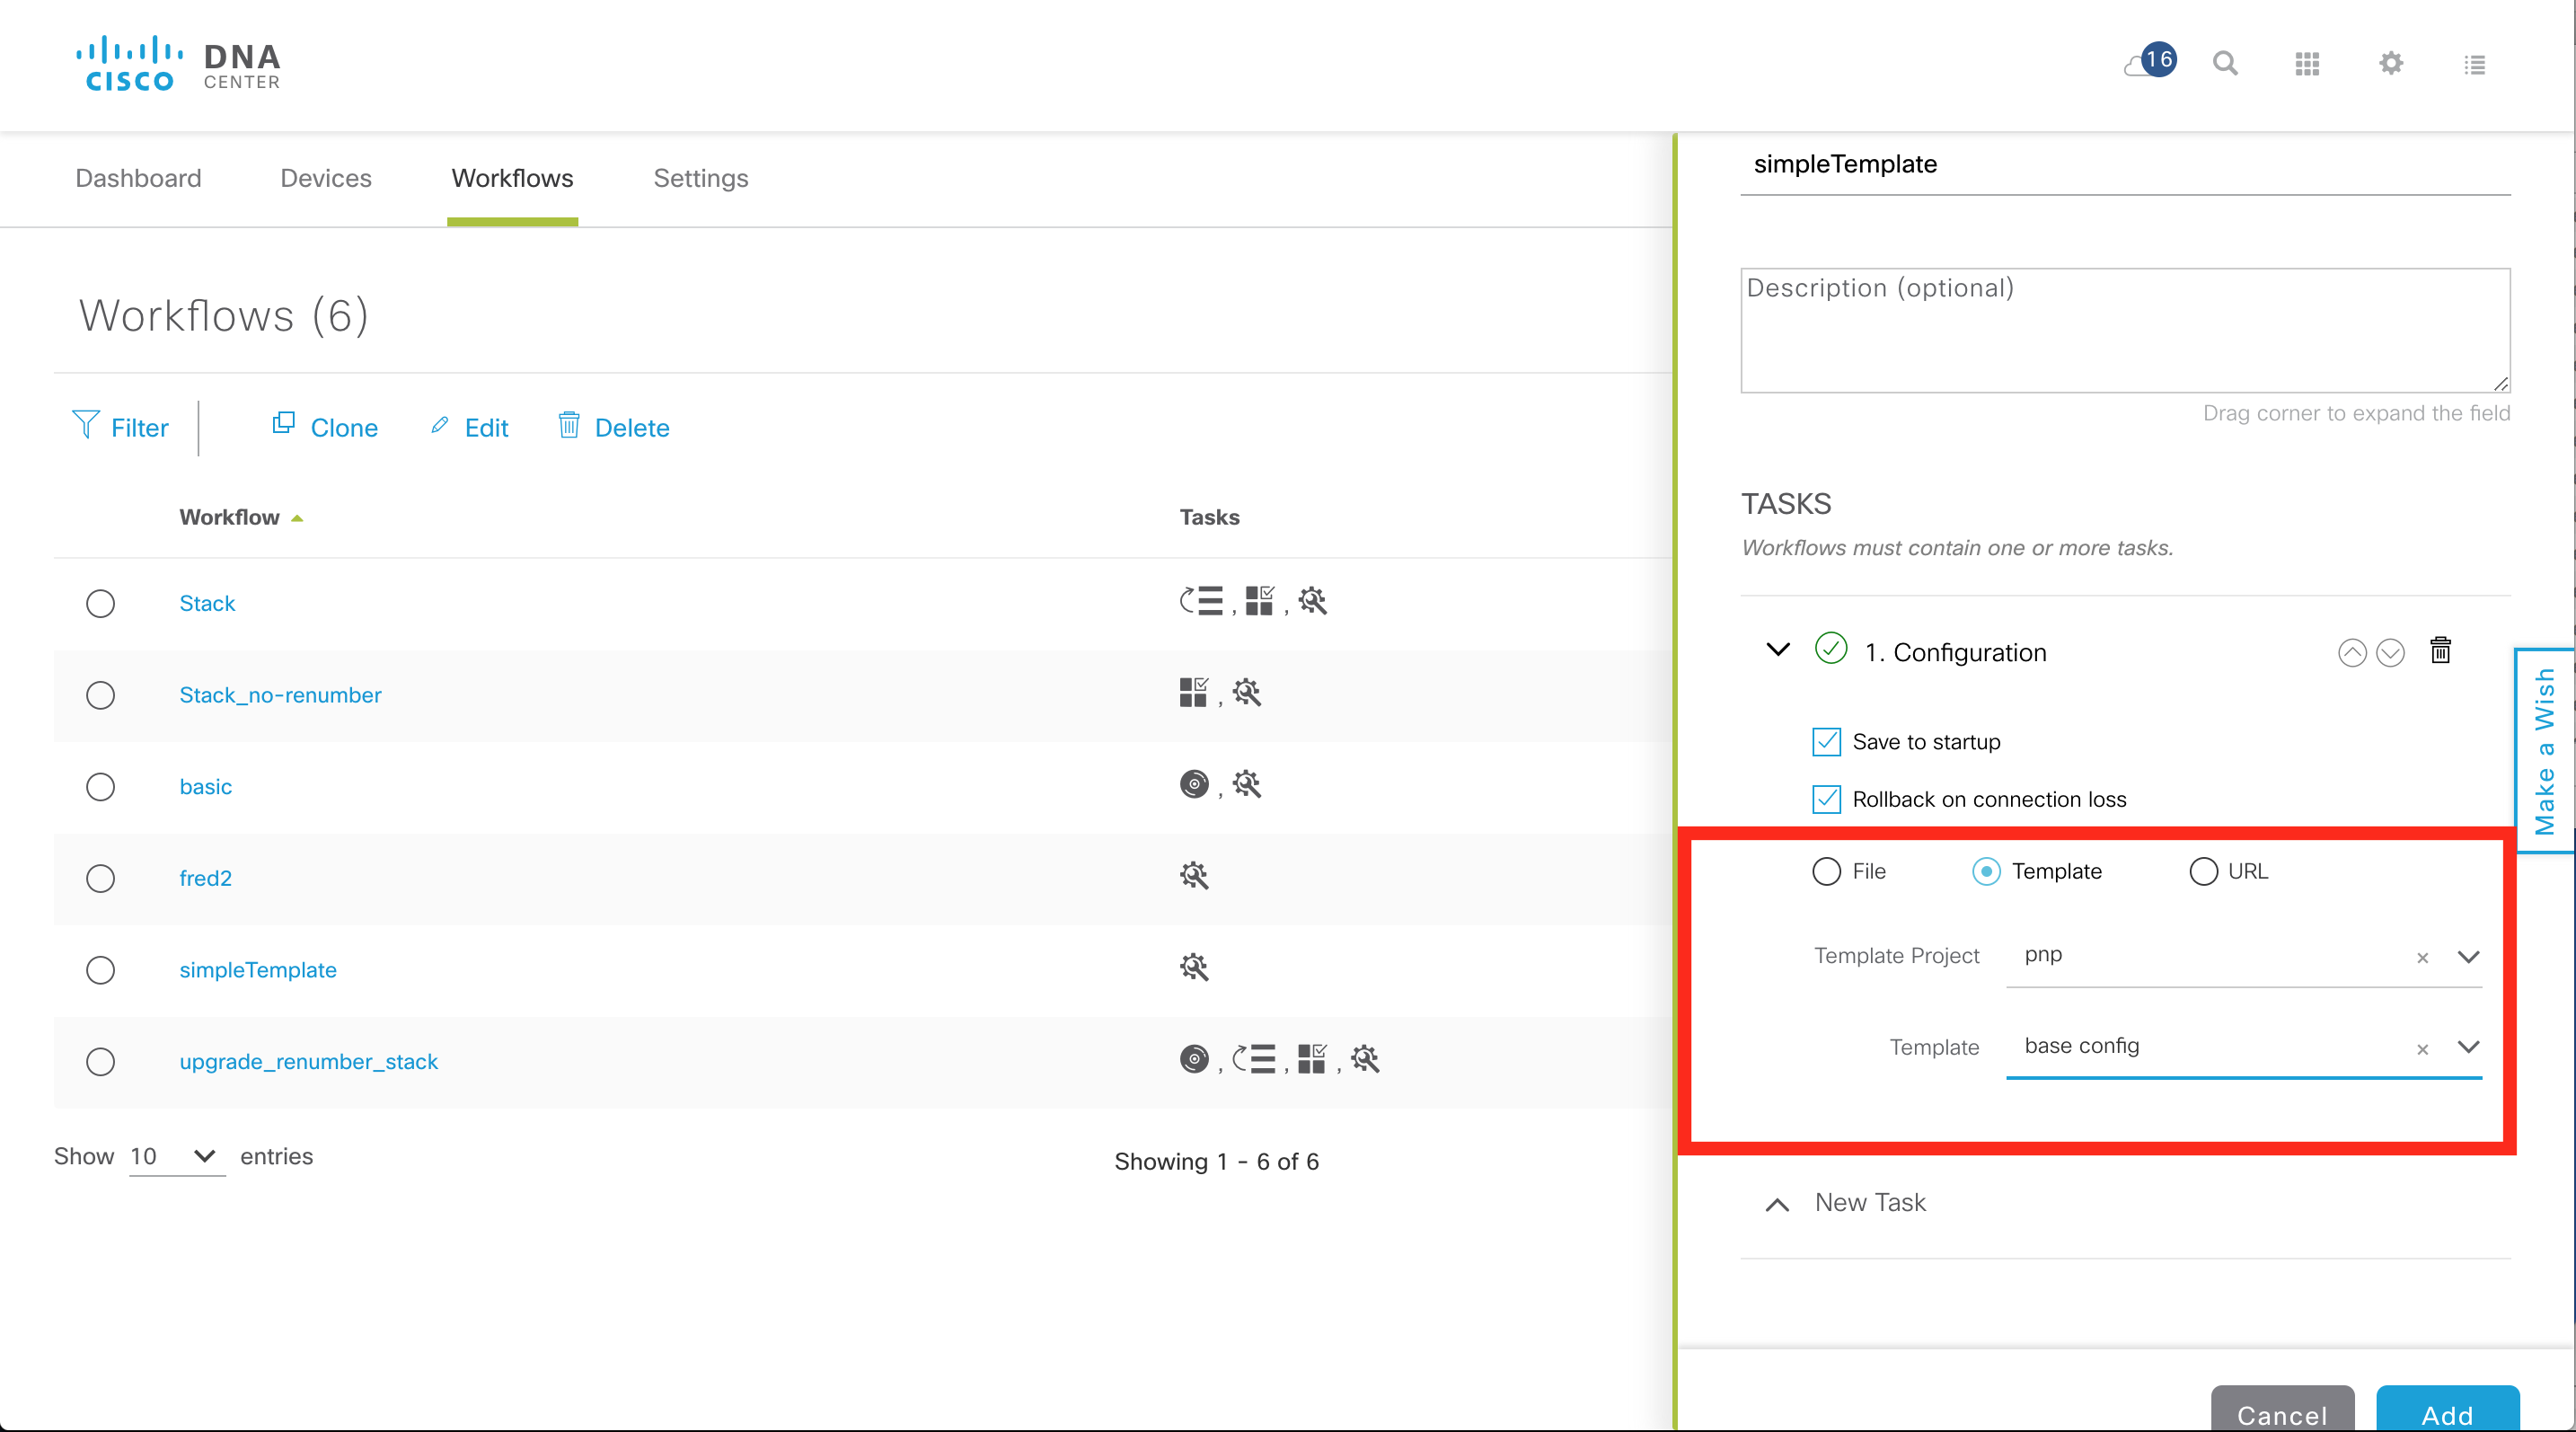
Open the app and the first big change is the definition of a workflow.  In this example, we define a simple workflow that uses a configuration template to provision a new switch.  There is also a default workflow.   Select workflows and “Add workflow” the default workflow can be edited.    Delete the image task (which will upgrade the IOS on the device) and then select a template for the configuration file.

simpleWorkflow.png

For simplicity we assume the template has already been created.   There will be another blog series on templates.  NOTE: It is still possible to upload a discrete configuration file per device (not template).   Templates have projects, so a template needs to be created first.   The simple workflow leaves a single step, which will deploy the template called “base config”.

selectTemplate.png

Adding a Device

Unlike APIC-EM, there is no concept of project exposed.

There is still an unclaimed or pre-provisioned PnP flow.  The difference is that everything is now “claimed”.  To pre-provision a device,  add it to PnP, then “Add + claim” it.

add-device.png

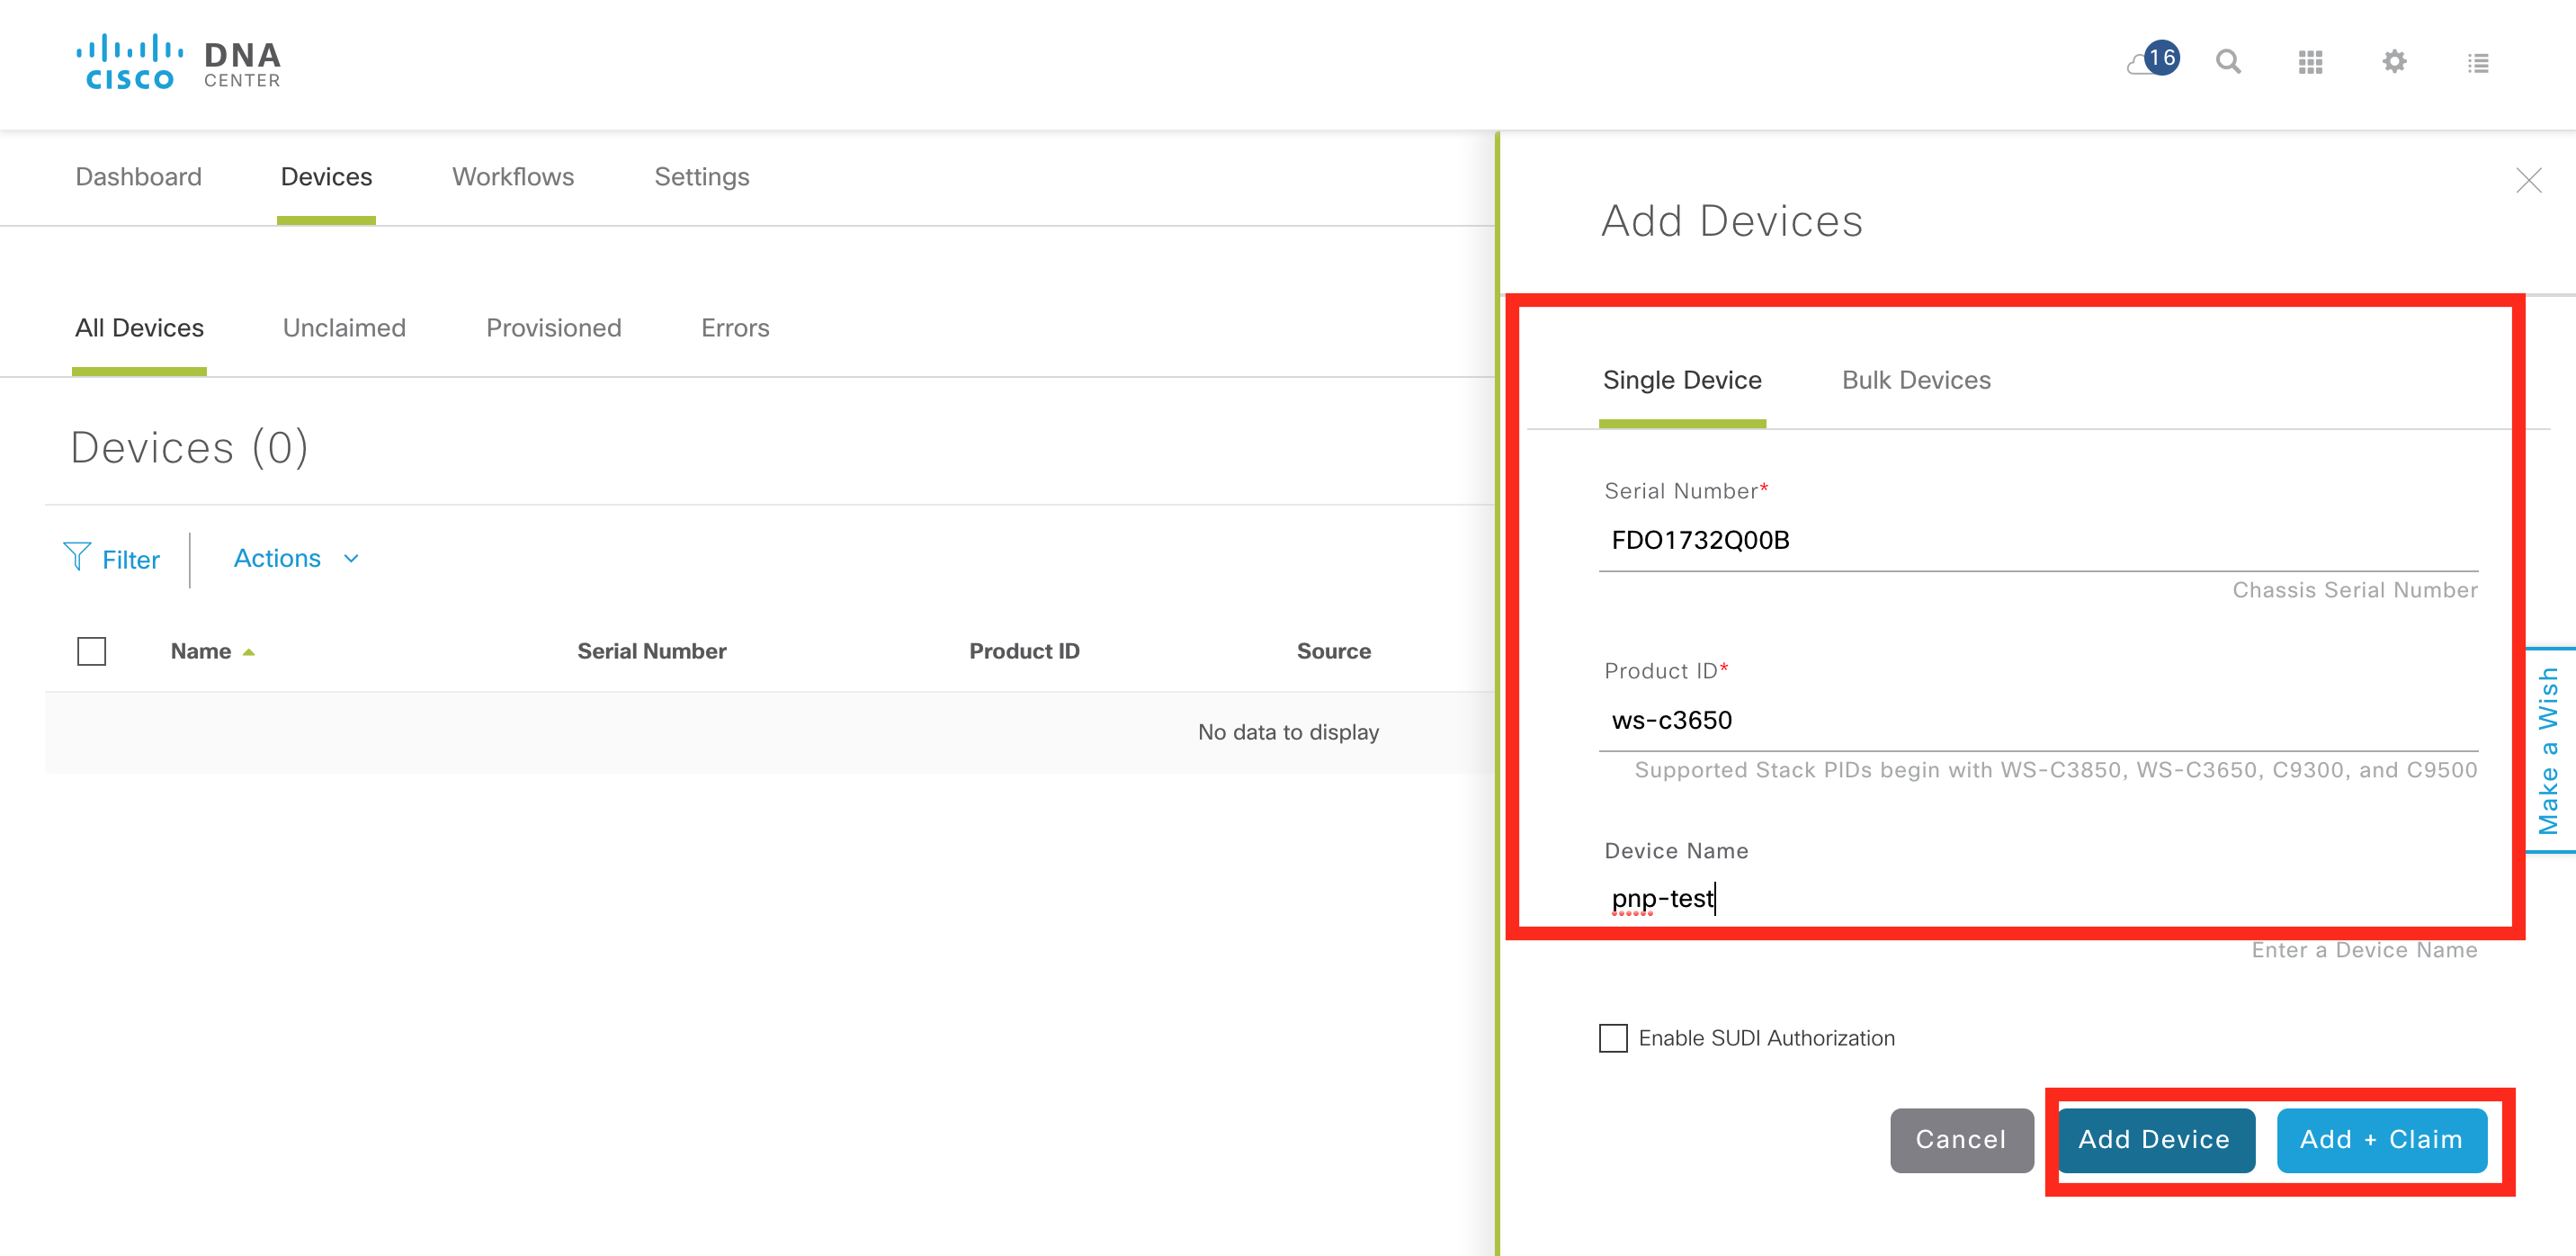
When claiming the device, the values for the template variables need to be defined.   In this case the “base config” template requires a single variable called “hostname”.   This variable is set to “pnp-test1”.

claim.png

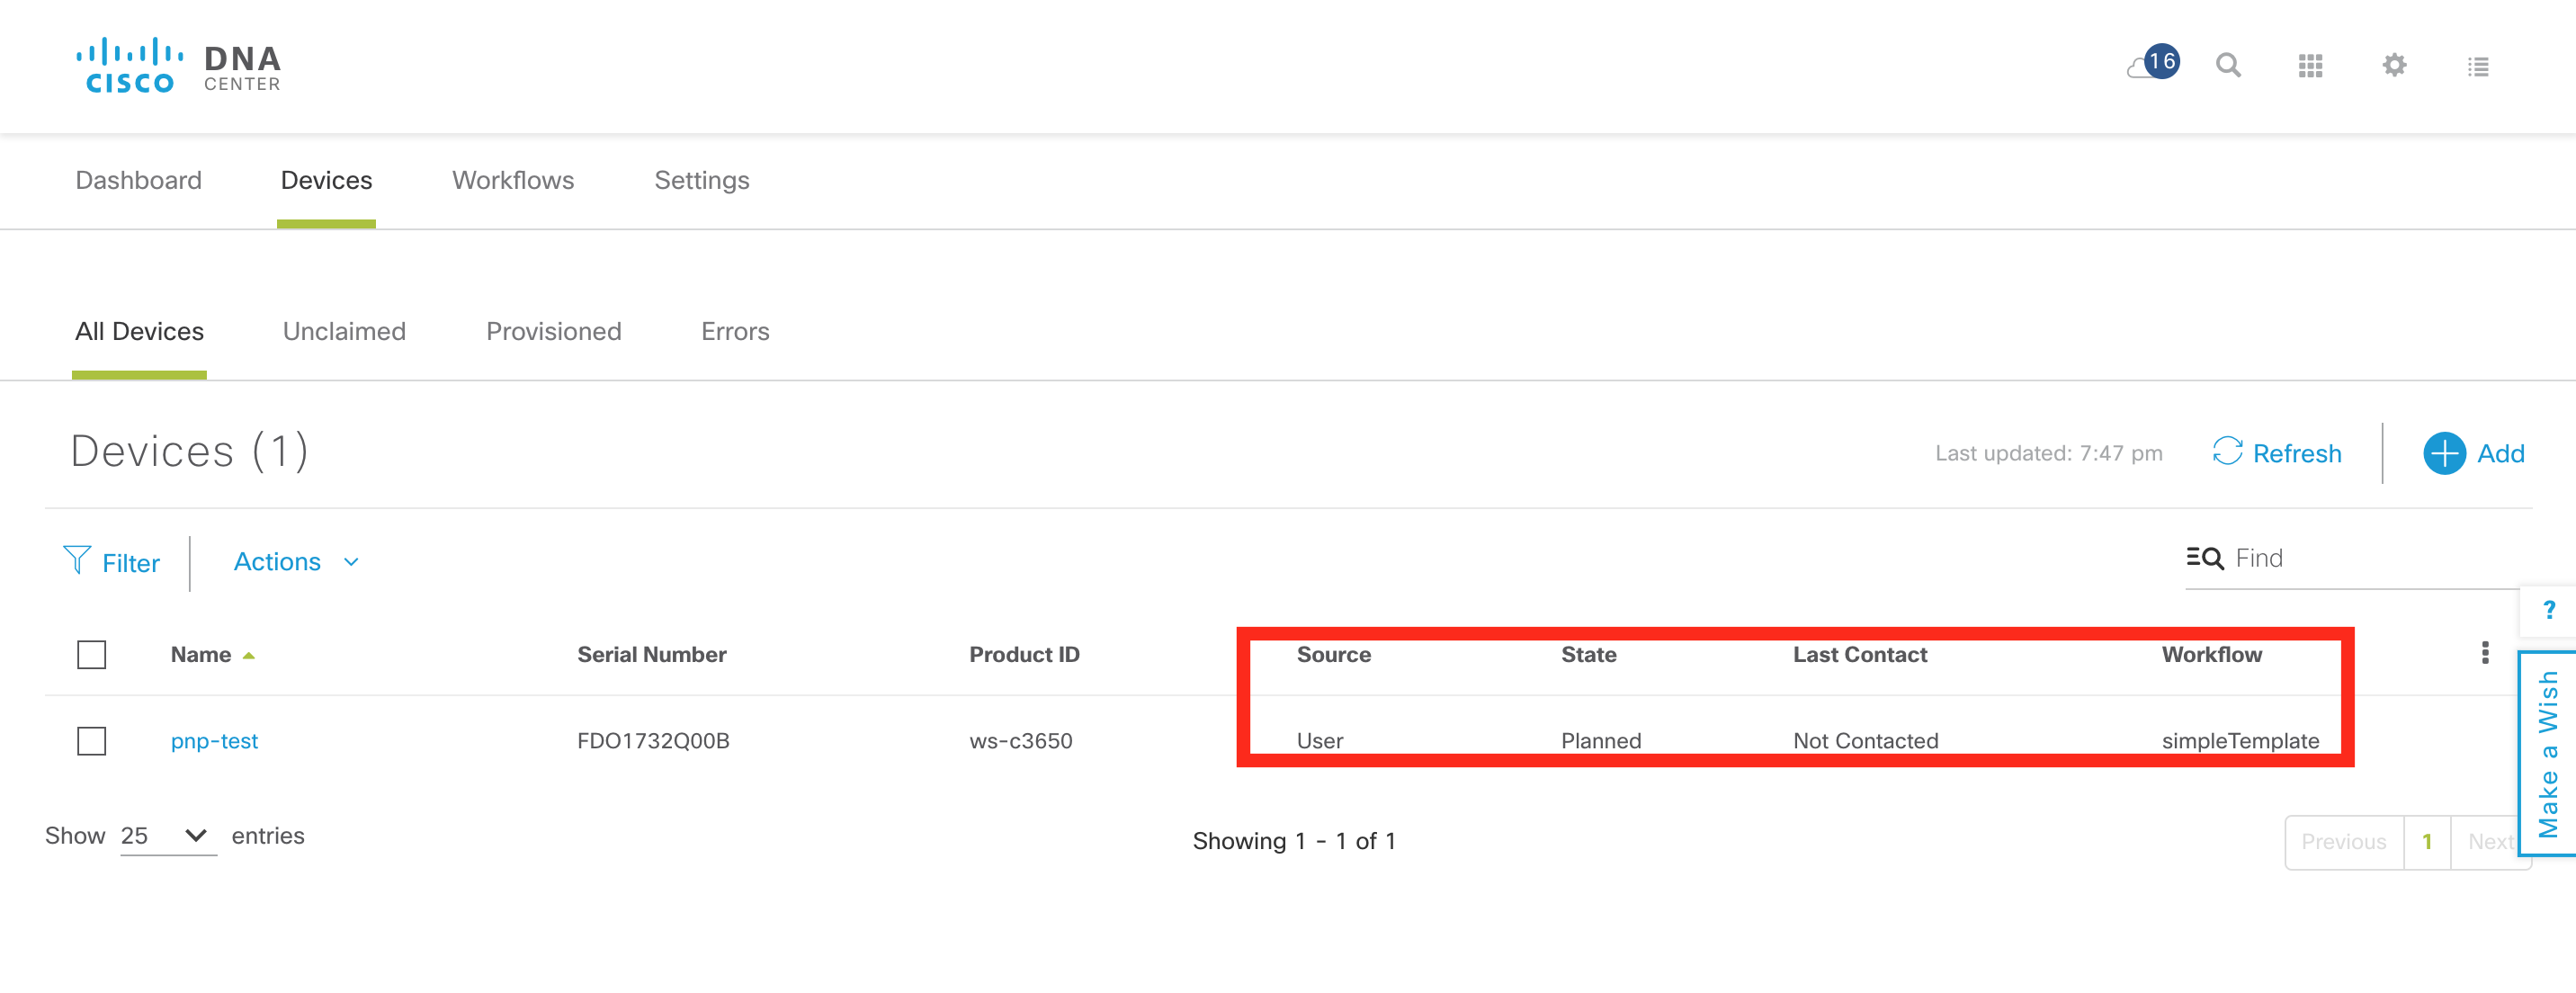
This results in a PnP device rule created on DNA Center.   The rule was created by the user, the state is planned (which means the device has not initiated communication yet),  and there has been no contact.  It also specifies the workflow for onboarding “simpleTemplate”.

rule.png

Once these steps are completed, the device is powered on.  It contacts DNA Center and the onboarding process begins.

onboarding.png

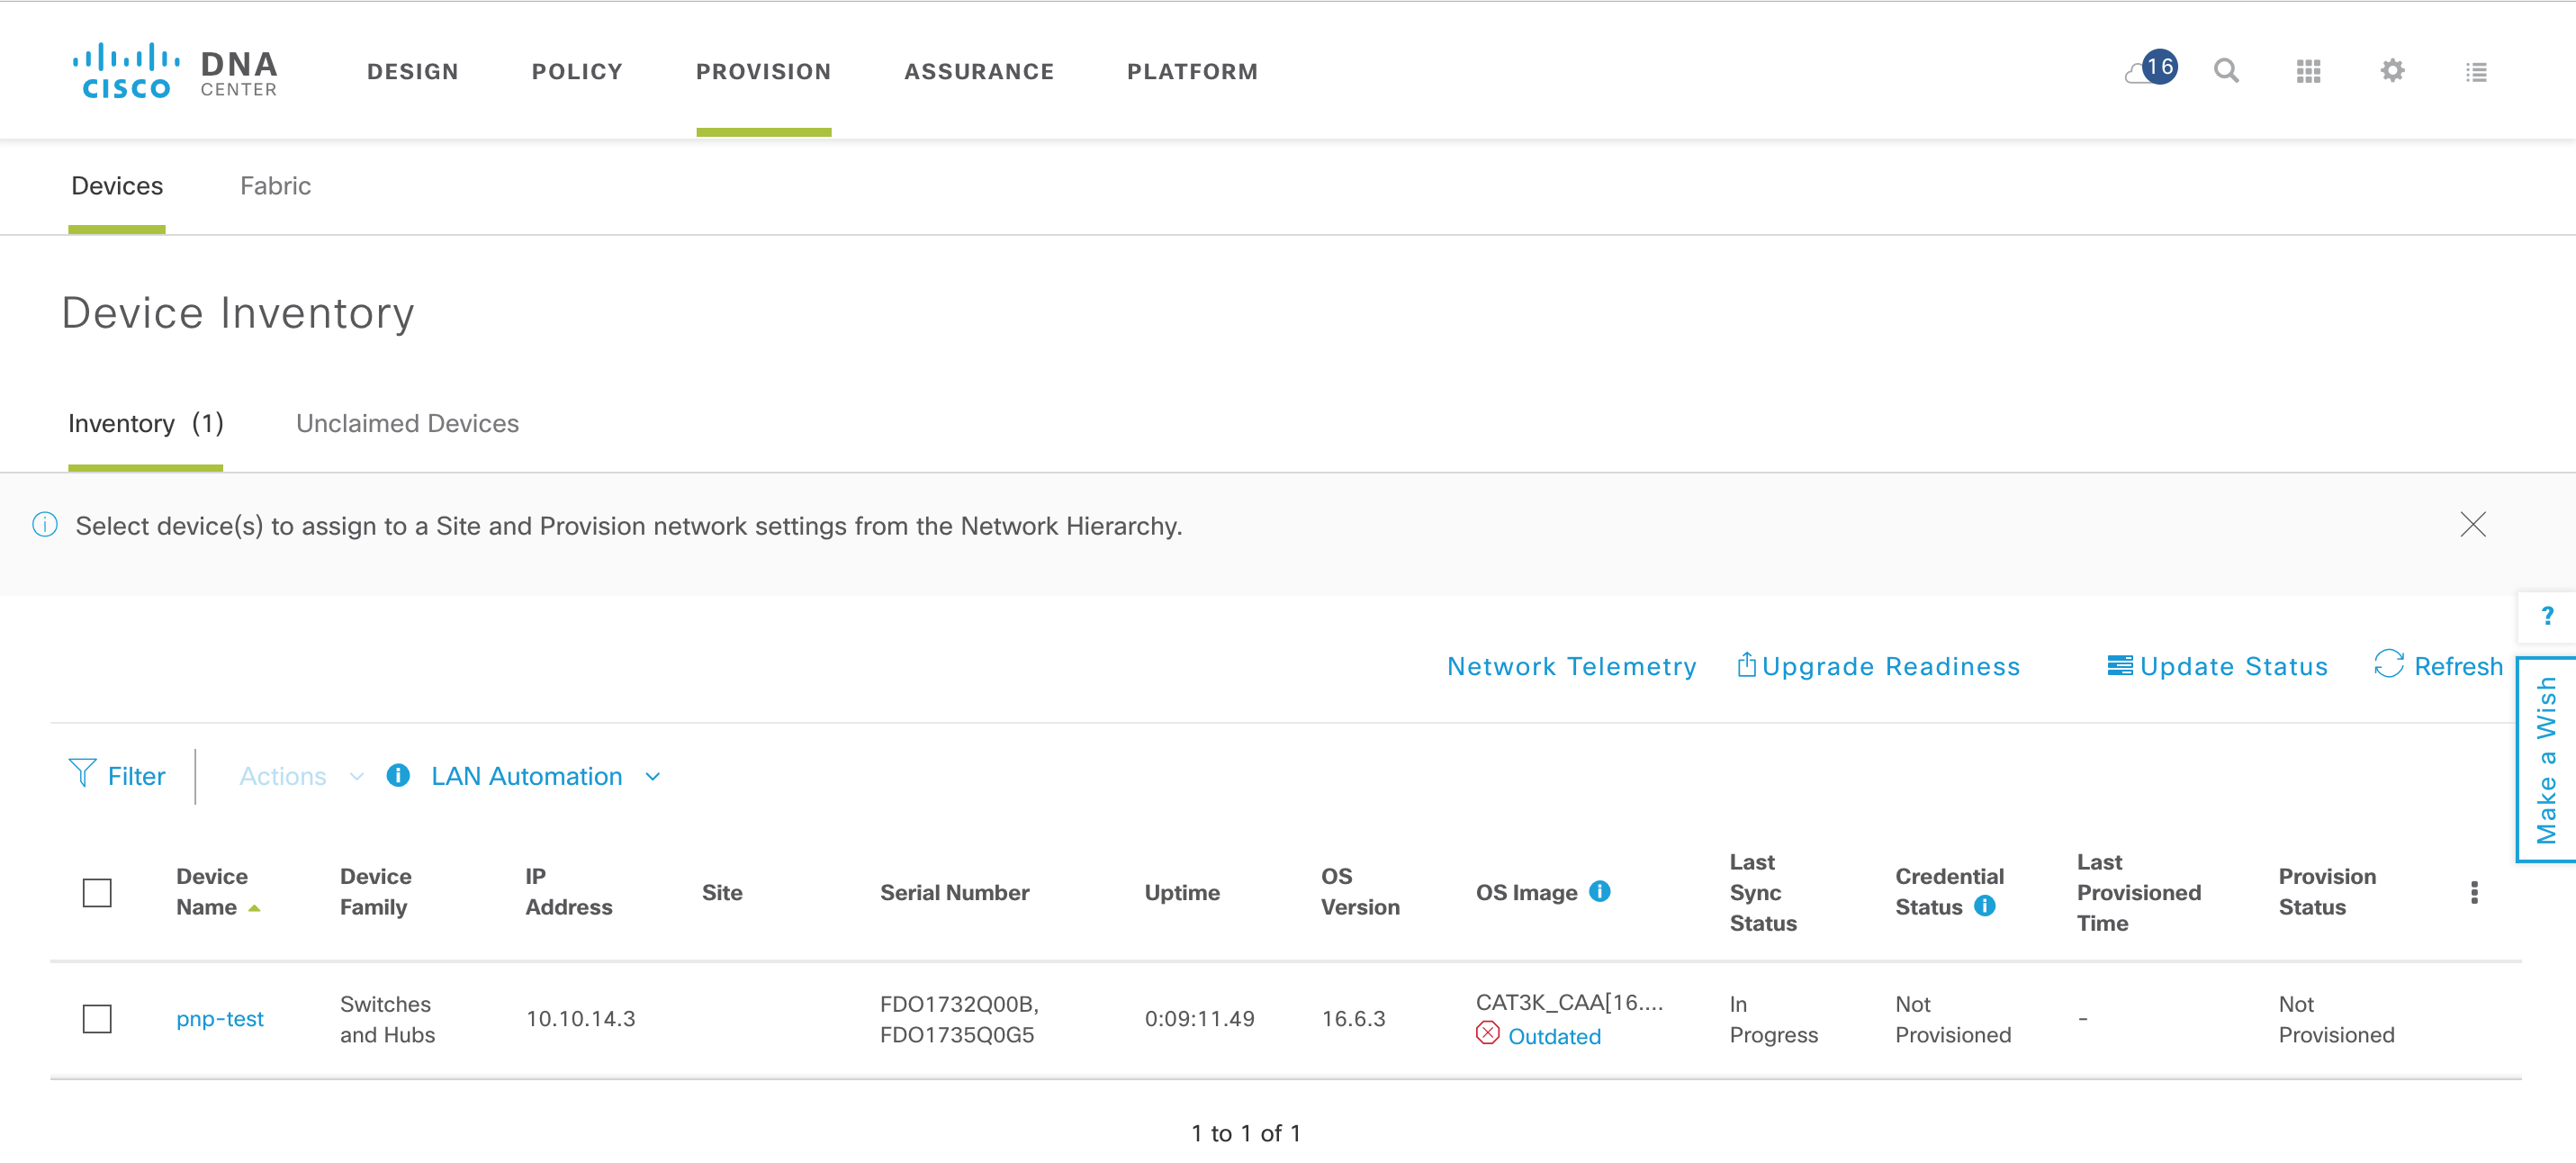
The process has completed, the device will be moved to provisioned and added to the inventory.

provisioned.png

Although the devices is added to the inventory, under the device provisioning page is appears as  “Not Provisioned”.  This is in reference to the Day-N provisioning which includes the site-settings, templates and policy provisioning.  This workflow will be further integrated in future.

inventory.png

What Next?

There was still a bit of human activity in provisioning this device.  I needed to create the initial template file, add the device, claim the device and provide values for template variables.  Oh, and I needed to plug the device in and power it on.  All except the last step I could automate.   Imagine you had 1600 switches you wanted to pre-provision with a template!  The next blog will show how the REST  API can automate this process.

In the meantime, if you would like to learn more about this, you could visit Cisco Devnet. DevNet has further explanations about this. Also, we have a Github repository  where you can get examples related to PnP.

Thanks for reading

@adamradford123

7 Comments
apicguy
Level 1
Level 1

Hi Adam. We are going to use the plug-and-play module for APIC EM for thousand of routers. 


When using a hostname with 16 characters or more, the provisioned device goes into ERROR stage with the output below: 


% Hostname "189228-TEST123456 " is not a legal LAT node name, Using "CISCO_2860EF"


There are also some errors with IP SLA's.


Are there any way to make APIC-EM ignore some or all syntax checks, so it goes to Provisioned state?

aradford
Cisco Employee
Cisco Employee
Hi,

In short there is no way to turn of syntax checking as we wanted to make sure the configuration is successful.

We should fix this in IOS, which will not help you in the short term.

There is a way I can think to workaround it, that involves an EEM script to configure the hostname and remove itself.

I have documented these before in other blogs.

The EEM script runs 30sec after the configuration is saved (and PnP is happy), it then configures the hostname (ignoring the message) and saves the new config, as well as removing itself.

I call it a self destructing EEM script.

https://community.cisco.com/t5/networking-blogs/network-automation-with-plug-and-play-pnp-part-6/ba-p/3660824

In your case, if the script is not going to impact connectivity, you should be able to get it to fire in 30secs

Adam
apicguy
Level 1
Level 1

Thanks for the prompt reply. 
I'll add the hostname issue to my already configured self destructing EEM script


event manager applet POST_PNP_IR809
event timer countdown time 20
action 0.1 cli command "enable"
action 0.2 cli command "cellular 0 lte profile create 1 APN.XX" pattern "confirm"
etc.


I also have issues with uploading IR IOS to the APIC-EM server. i.e "ir800-universalk9-mz.SPA.156-3.M". Do you know about any workarounds here?

aradford
Cisco Employee
Cisco Employee
The filename should end in .bin?

Adam
apicguy
Level 1
Level 1

Correct. The IR series do bundle install and upgrade hypervisor as well. 
Things is getting close to put the APIC-EM into production. 


With newer IOS I'm stuck in "Failed health check since device is stuck in non-terminal state FILESYSTEM_INFO_REQUESTED for more than threshold time" after "Device first contact"


Do you know if SAN supports wildcards (domain changed by me)? 
From cert: 
DNS Name=*.isp.com


IR800#show crypto pki certificates | sec Subject
Subject:
cn=*.isp.com
ou=Domain Control Validated


DHCP is 

option 43 ascii "5A1N;B1;K4;Iapicem.isp.com;J80"


Hello,


We run an MPLS network in which basic BGP and physical interface configurations have to be present before any connectivity can be established. We're trying t use DNAC PnP to just ship routers and switches directly to our new sites without having to receive them in-house first, unbox them, configure them, then incur additional shipping costs and more lost time to send the equipment to its destination. My thought process was to send a router to its site, put just a bare bones config on the router through our cellular Out-Of-Band solution, throw a very basic config on the router just to get BGP up and establish connectivity, then allow DNA Center to find the router, push the image and configuration template out via Plug and Play. I'm running into issues, and I think it's due to the fact that when Plug and Play sees any configuration saved in NVRAM, it foregoes the PnP discovery process. Is this correct? And if this is correct, is there anyway to manually restart the PnP discovery process from the CLI? Your help is much appreciated. 

aradford
Cisco Employee
Cisco Employee
You put the “barebones” config on a USB drive and boot from that. The router will read in the config and then still PnP. You need to manually configure the pnp-profile as part of the config.

Remember with PnP, the router needs to find DNAC, not the other way around.

If you did not want to use a USB, you could save the file to flash, and then do a copy save-config run. That requires one manual step on site.

You could also look at PnP Cloud redirect, but this also requires some configuration to be done as the device needs an IP address, and routes (via BGP in your case).
Getting Started

Find answers to your questions by entering keywords or phrases in the Search bar above. New here? Use these resources to familiarize yourself with the community: