Summary
This article provides how we make use of CloudCenter’s brownfield import and action library feature with CloudEndure Live Migration to move Virtual Machines to AWS from vCenter
Product Versions Validated
Product | Version |
Cisco CloudCenter | 4.8.0 |
CloudEndure Live Migration | SaaS |
Details
Migrating applications to cloud can be overwhelming. Customers want to migrate to cloud with near zero downtime.
With latest release of Cisco’s CloudCenter you can discover existing virtual machines using Brownfield import feature. Imported VMs comes under the management domain of CloudCenter. Once imported the virtual machines can be governed, metered likewise. Action library feature in CloudCenter enhances the brownfield import feature by enabling day N operations on Brownfield and Greenfield deployments.
CloudEndure provides Live Migration and Disaster Recovery for any application, allowing companies to mobilize entire applications with their data to and across clouds with near zero downtime and no data loss. CloudEndure enables truly consistent, block-level, real-time replication using continuous data protection (CDP).
Here, we will explore how we can make use of CloudCenter’s brownfield import and action library with CloudEndure migration to migrate Virtual Machines to AWS from vCenter
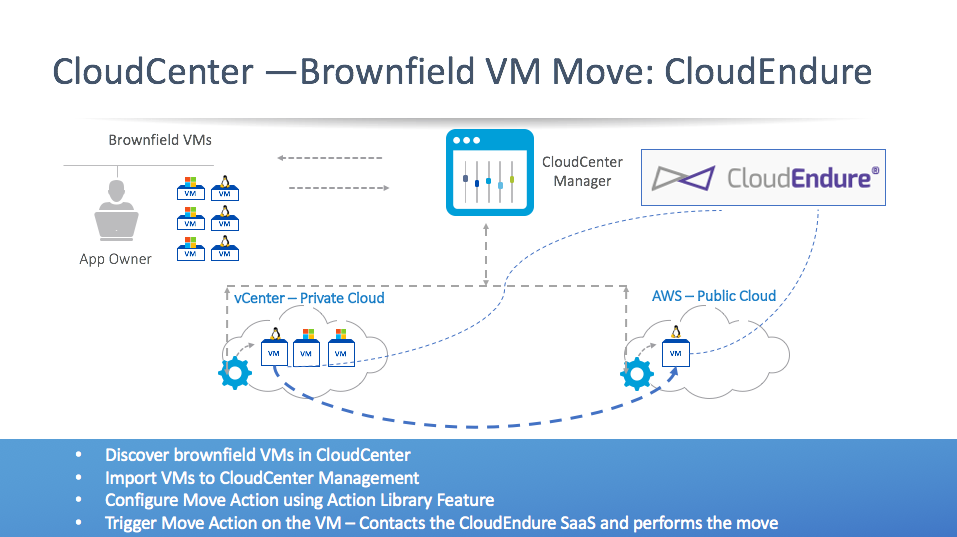
Figure 1 – CloudCenter Brownfield Migration (existing workloads) Flow
Flow of events for migration of virtual machine in CloudCenter and CloudEndure migration:
Day 0:
1. Define the vCenter Cloud in CloudCenter
2. Define the target cloud in CloudEndure SaaS
Day 1:
1. CloudCenter discovers existing Virtual Machines running vCenter
2. Existing VMs show up as “Unmanaged” as list of running VMs in the cloud
3. Import to CloudCenter feature brings the VM(s) under CloudCenter management thereby enabling administrator to use consistent governance, metering policies
4. Define a Migration action in Action Library to call CloudEndure Migration Script. It then shows up as one of the Actions for a Virtual Machine in the cloud
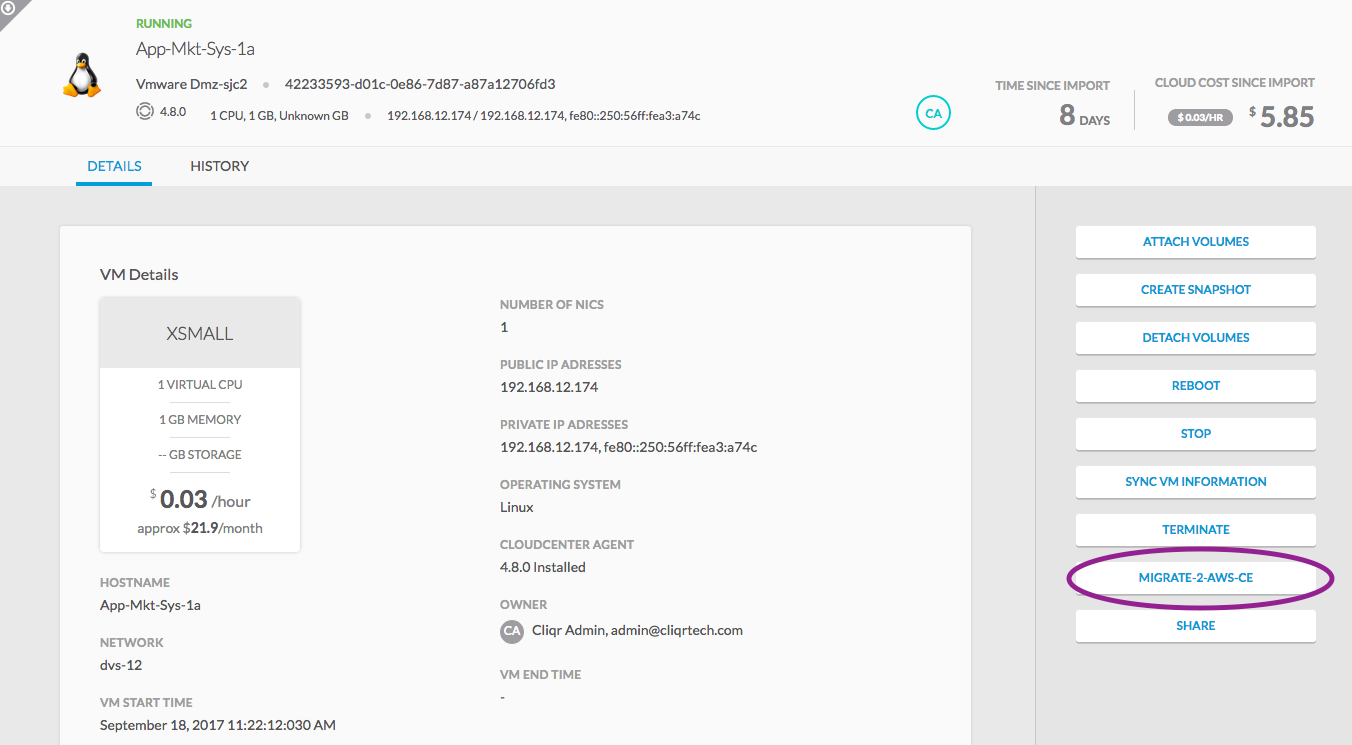
Figure 2 – VM Page of CloudCenter highlighting Migration action button
5. Execute the Migration Action to start the migration to cloud
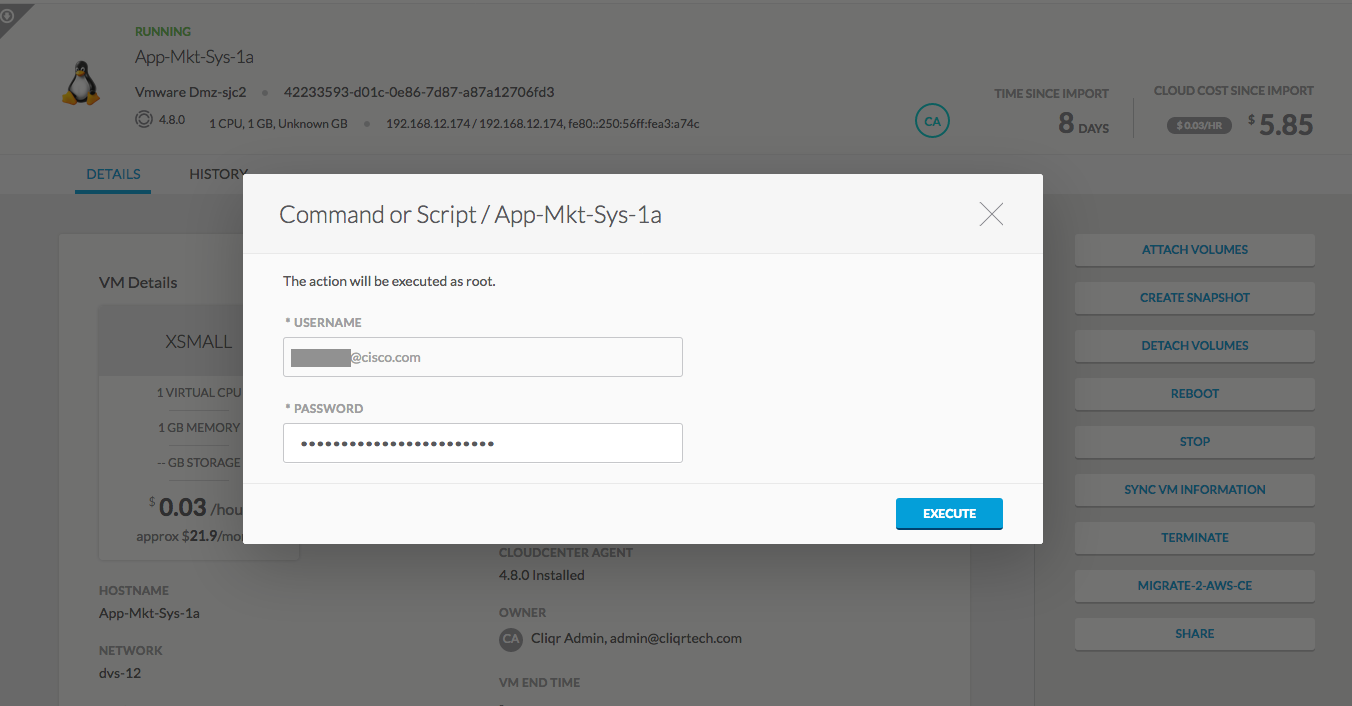 Figure 3 – Migration Action for a VM
6. Once completed, the migrated VM shows up as “Unmanaged” in the destination AWS cloud
7. Perform #3 to make the VM appear as Managed VM in the cloud
8. Test the VM and its contents
9. Perform the cutover – Shutdown (or terminate) the source VM in VCenter, make the VM in AWS cloud live for the users
Migration Action and CloudEndure Migration Script
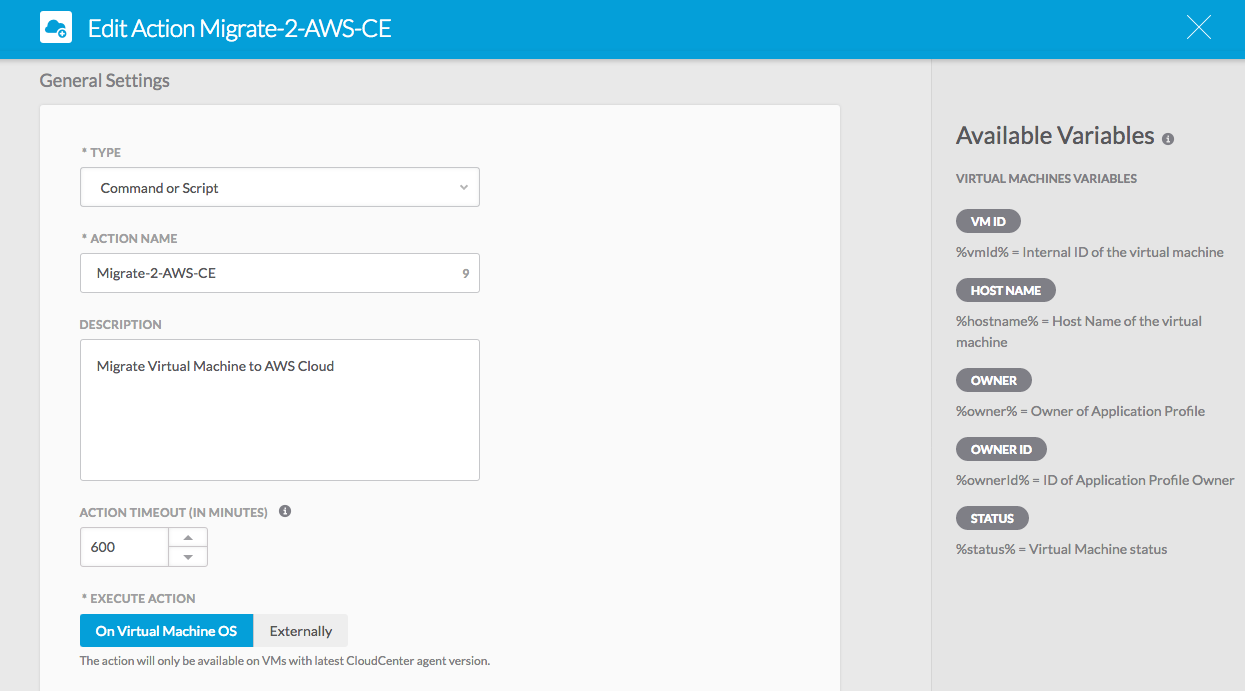 Figure 4 – Details of Migration Action defined in Action Library of CloudCenter
The script that gets called as part of Migration action in CloudCenter contacts the CloudEndure SaaS and performs the following steps:
1. Installs CloudEndure Agent on the Source VM
2. Triggers the replication to destination cloud
3. Creates a blueprint for replica configuration
4. Instantiates a VM in the target cloud
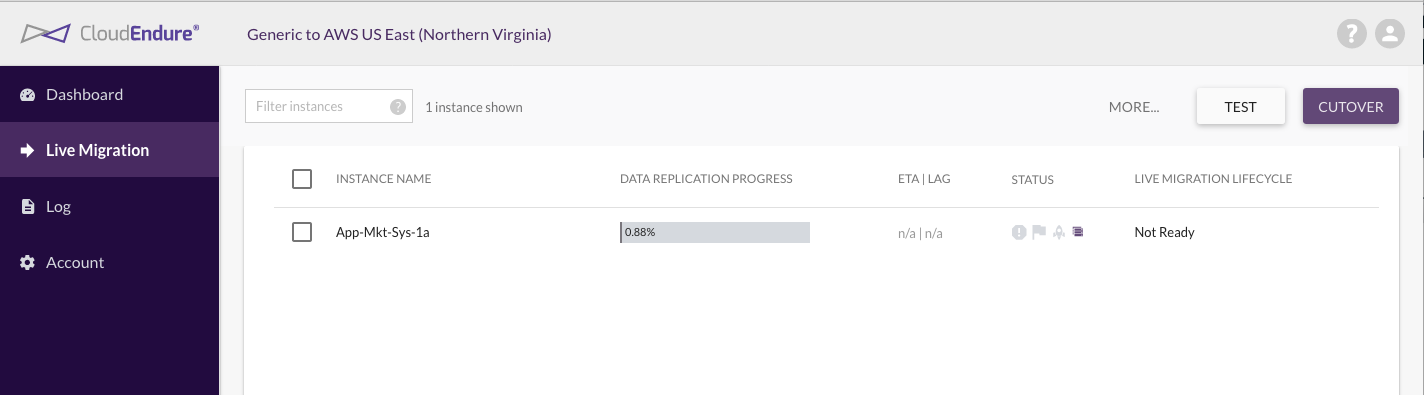
Figure 5 – VM Migration Dashboard view in CloudEndure SaaS
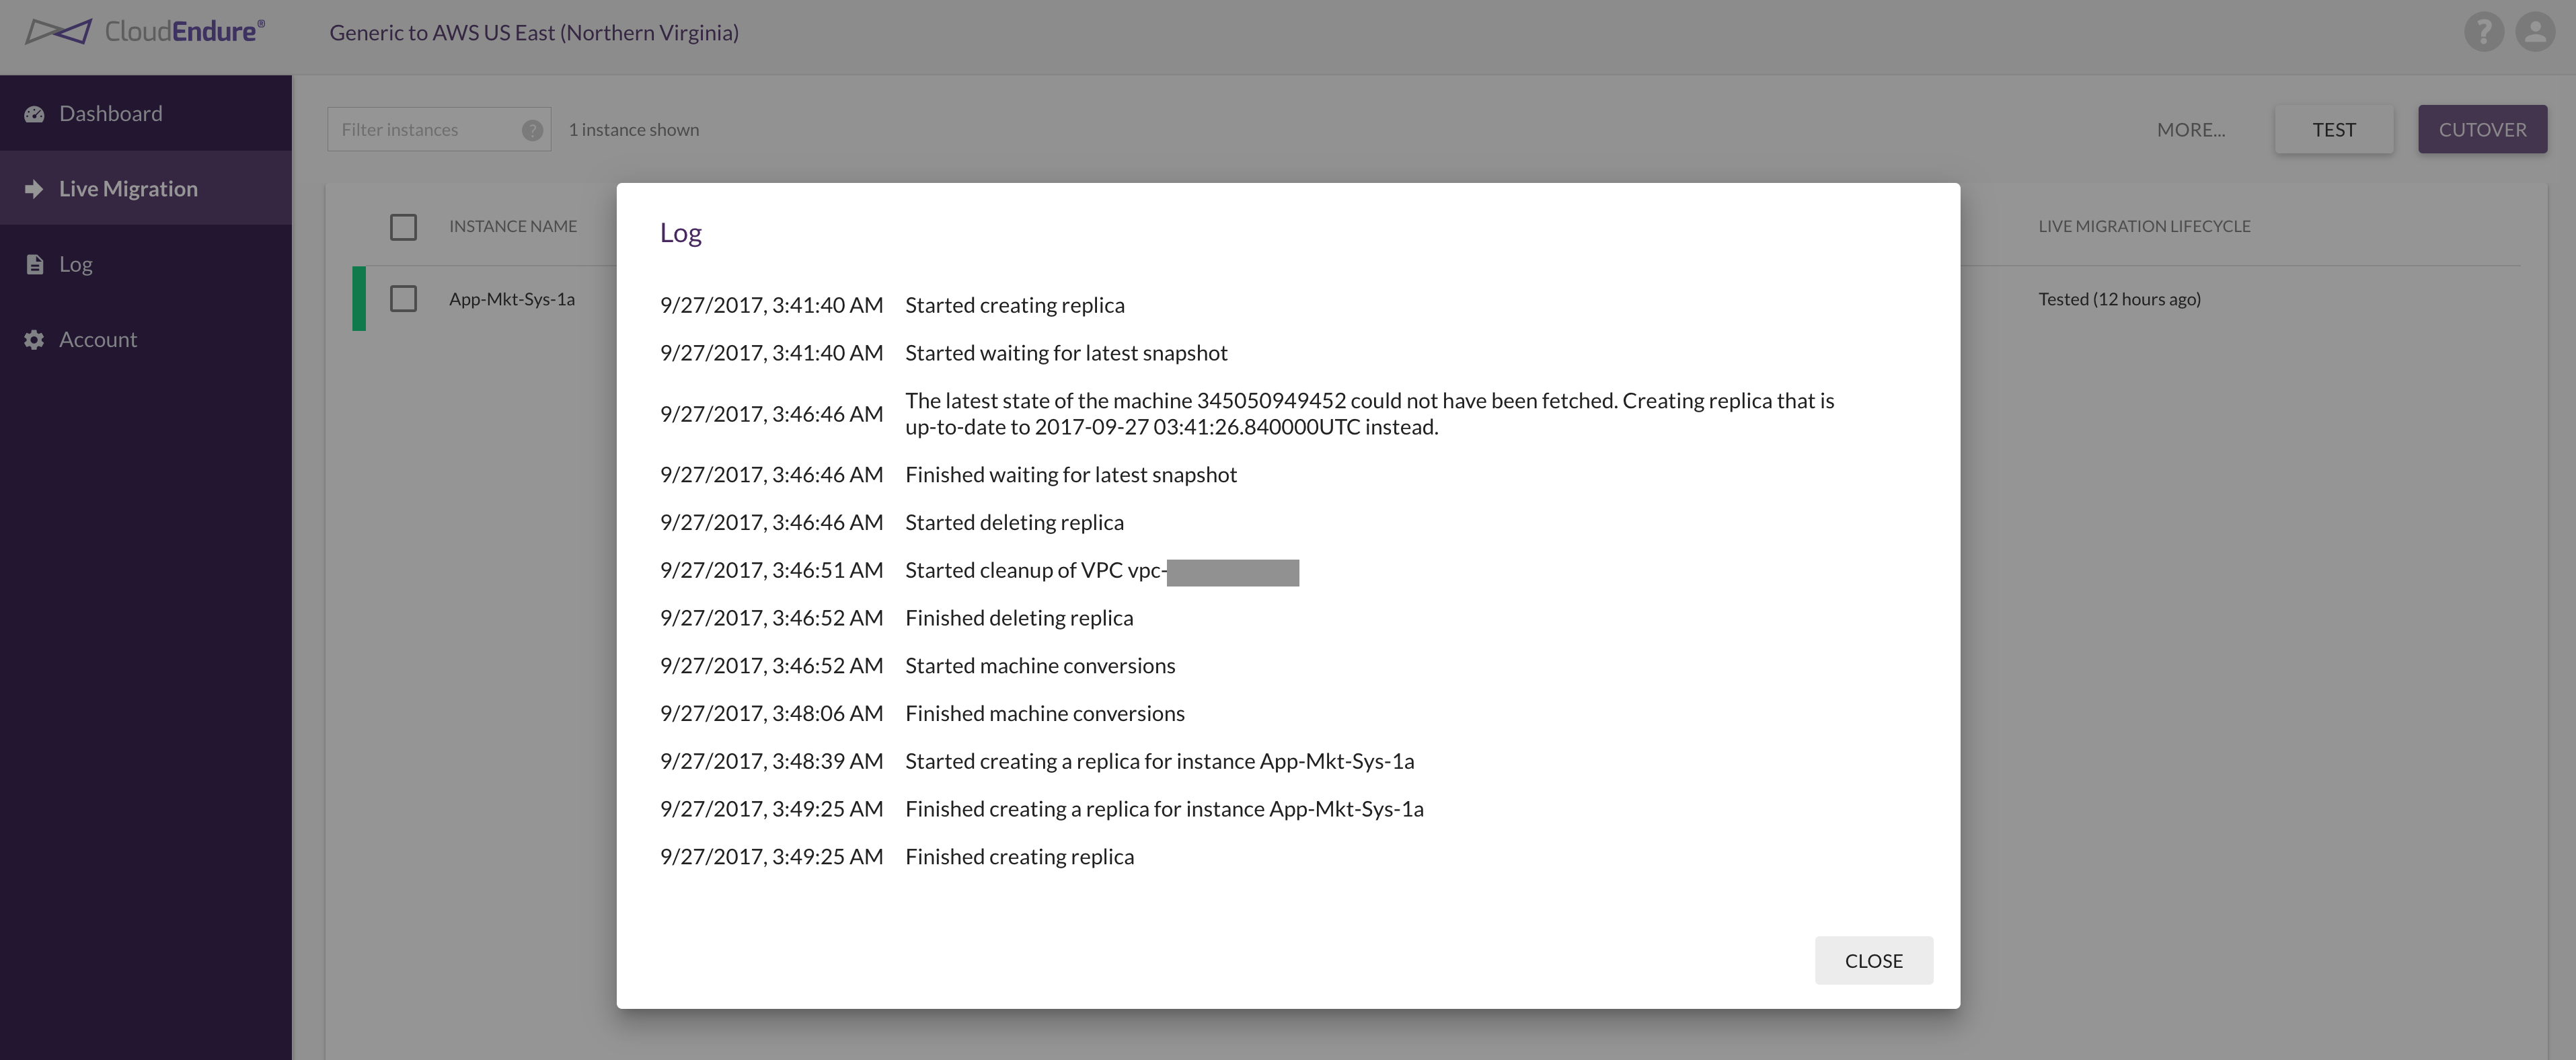 Figure 6 – VM Migration Log display in CloudEndure SaaS
Script used in the validation exercise is available at the following github location:
https://github.com/datacenter/c3-community/tree/master/Integrations/Migration/CloudEndure
Move Wrapper Script for Action – init.sh
Migration Script for Migration – CE_Cisco_Integration.py
Additional Information
CloudCenter – http://www.cisco.com/go/cloudcenter
CloudCenter Documentation – http://docs.cloudcenter.cisco.com/
CloudEndure – http://www.cloudendure.com/
CloudEndure Documentation – http://docs.cloudendure.com/
