- Cisco Community
- Technology and Support
- DevNet Hub
- DevOps
- Knowledge Base
- Delivering self-service with Cisco ACI and HashiCorp
- Subscribe to RSS Feed
- Mark as New
- Mark as Read
- Bookmark
- Subscribe
- Printer Friendly Page
- Report Inappropriate Content
- Subscribe to RSS Feed
- Mark as New
- Mark as Read
- Bookmark
- Subscribe
- Printer Friendly Page
- Report Inappropriate Content
12-08-2022 09:07 PM - edited 12-08-2022 09:21 PM
Introduction
In this blog let’s travel through the life of the modern application. Here you will be exploring how a modern application is built, its evolution and how it is delivered into our world. This includes how to remove silos between development, operation, software, and infrastructure teams. You will dive into the rabbit hole of continuous delivery and cover topics like Infrastructure as Code with Terraform, Policy as Code with Sentinel, Service Mesh or Canary Deployments with Consul and show how they all come together to enable developer teams continuously deliver applications on Cisco ACI using service catalogues.
Let’s take a scenario where you will be seeing a lot of technologies where hundreds of applications could be hosted on a platform. Here you will be using the Natilik Platform.
Natilik Platform
As seen in the diagram below, lots of technologies like ACI, Portworx, UCS etc. need to talk with each other for the deployment of the application. The beauty of this platform is that to manage this platform, which consists of six data centers, you only need four engineers. The main challenges the platform faces is that to get a customer onboard and get an application deployed, it may take around 6 weeks of time. So, it’s a slow process with increased risk and lack of standardization. This lack of standardization is because the data center environment setup at one location will be different from another data center.
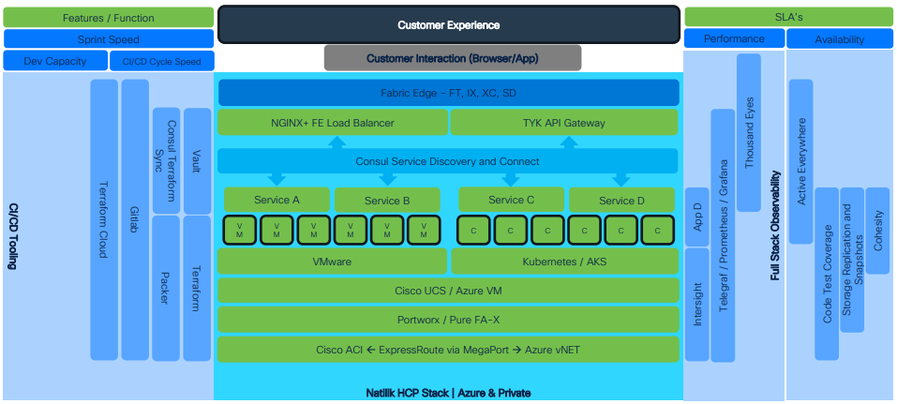
To resolve those challenges, you have the DevOps Promise. In this context you may define DevOps as a collection of processes and tools to make sure that your application will be delivered efficiently, fast and secure. You will be focusing on these 3 main areas, as mentioned in the block diagram:
- Building of application is consistent and fast
- Once the Building is done it should be stored somewhere with versioning done and available to be released for the deployment when required.
- And last phase, where the automation of deployment to production happens.
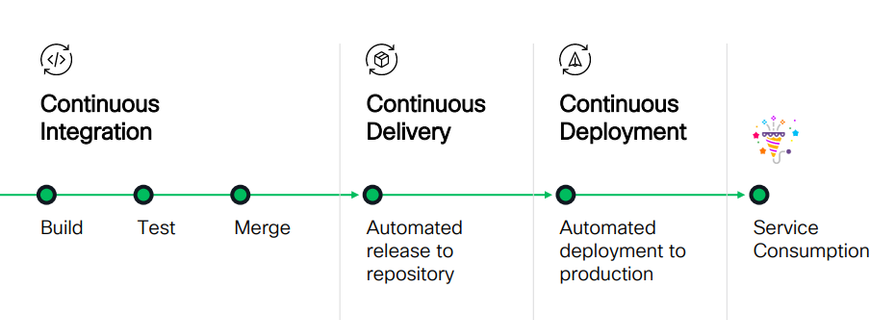
In most cases, the first two phase of automation happens smoothly. But when the application is put on the infrastructure of the production environment, things won’t happen smoothly. In this situation, Manual Ticket-based Workflow comes to picture.
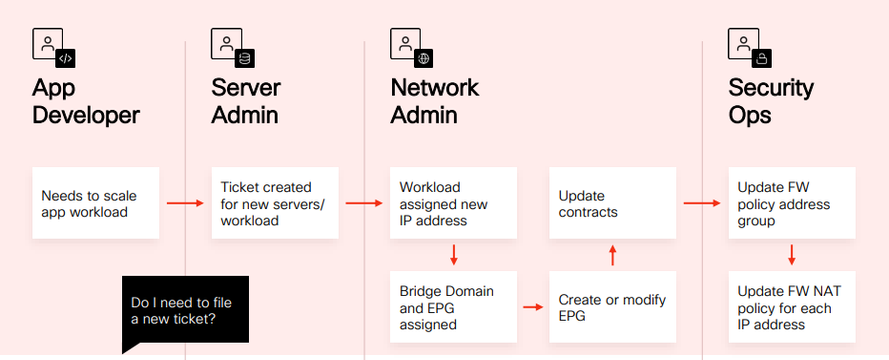
Here, in the above scenario, the application developer, after testing and building the application, will be moving for deployment. For example, let’s take a scenario were the application needs to be deployed on an ACI platform. In that case, for the application to get deployed, the deployment team had to assign ip address, firewall policies etc. To get those details the application developer needs to file a ticket. It’s a very slow and painful process.

To resolve that, you need to remove the ticketing system using Terraform, which is an open-source, infrastructure as configuration, software tool created by HashiCorp. The workflow of Day 0 & Day 1 Network Infrastructure Automation will be as show below.

But to achieve repeatable application deployment lifecycles you need to have Day 2 (Self-Service) IaC integration to facilitate network automation: Consul-Terraform-Sync (CTS).
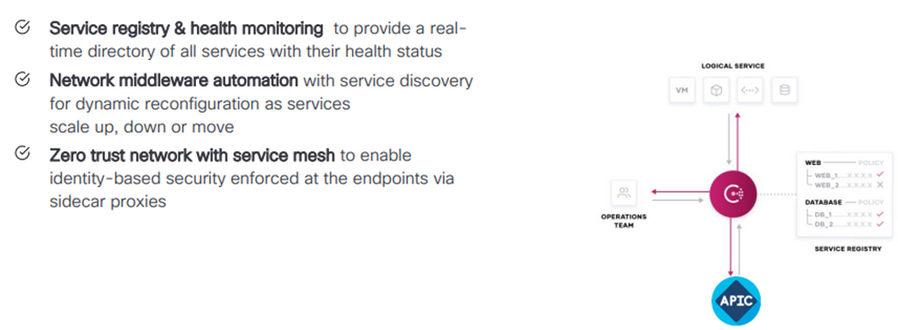
Let’s see how you as a application developer could deploy your application on top of the ACI platform, without interacting with the deployment team, using Consul and Terraform. Before diving deeper, let’s understand what is Consul?
Consul provides the foundation for cloud network automation as a central service registry for service-based networking in the cloud operating model.
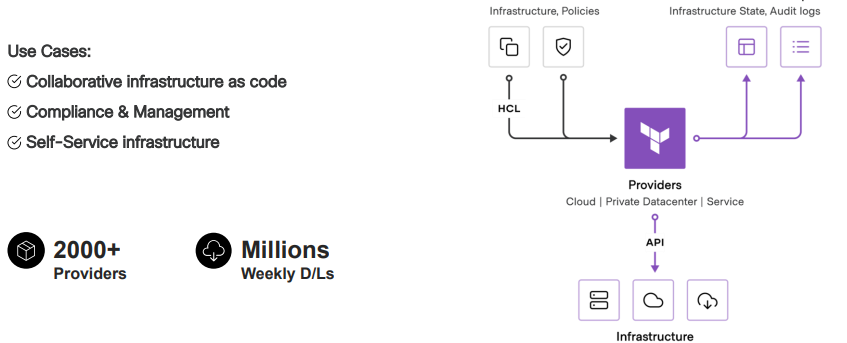
Next, to automate the registration you need Terraform. What is Terraform?
Terraform provides the foundation for cloud infrastructure automation using infrastructure as code for provisioning and compliance in the cloud operating model.
The product that is been developed is Consul-Terraform-Sync (CTS).
Let’s take an example where we got a new service which is going to get registered with Consul. Once the CTS monitors the registration, it ensures that the application is online which reflects the state of the application.
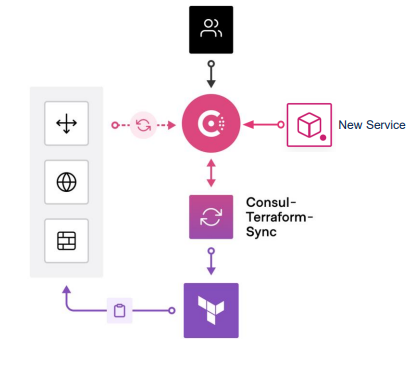
- Consul catalogue updated with new service registrations/changes.
- CTS pulls service information from Consul catalogue
- CTS generates new Terraform manifest and initiates a Terraform Cloud run to apply changes.
Let’s have a high level overview of the workflow.
First, the operator commits the code and deploys the module on an application server. Then it’s pushed to GitHub where it is integrated with Terraform. Terraform watches any changes in the repository. Once any change is noticed, you must plan, deploy, and execute where VMs needs to be spun up. From this standpoint, the operator is no longer involved. The code is checked in and Terraform will be executing the workloads.

Consul is now going to register the services where the web server and application server need to communicate with each other. Next step will be that the Consul-Terraform-Sync is going to detect the new services and going to execute and provision the fabric on real time.
Now let’s dive into the Demo. First, navigate into the virtual Natilik Platform where you will be deploying all the workloads.
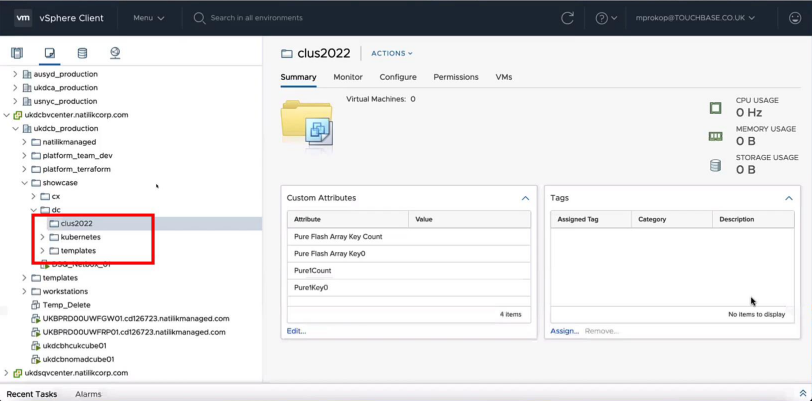
You are having a dedicated ACI tenant, where you will be concentrating on creating Endpoint Security Groups. Basically, every virtual machine created will be assigned to Endpoint Security Groups.
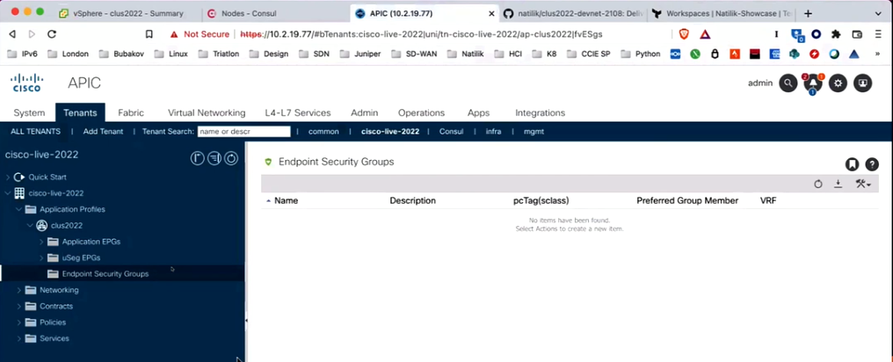
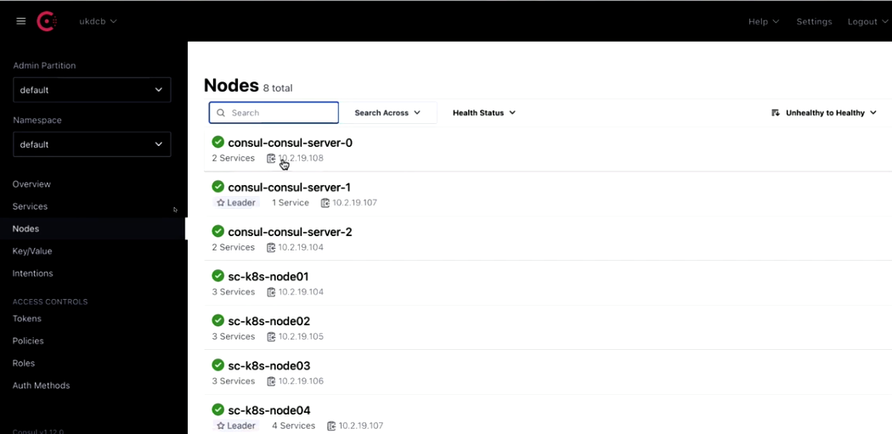
Next, navigate to Consul and check the nodes to find if there are any applications with naming convention ‘app’ or ‘web’, which you decided for the lab.
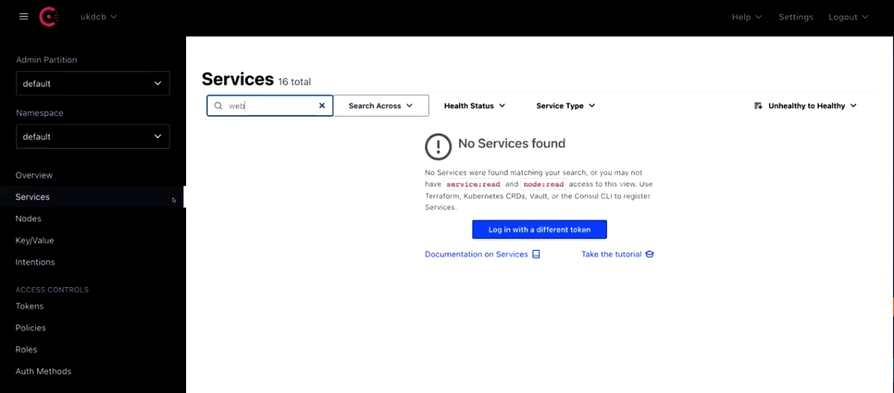
Also, check the services for the name ‘web’ or ‘app’, which you will not be able to find.
Coming to the Editor, we can find were the Terraform script is written to deploy the applications. If you navigate through the code, you can find the name, quantity, service port and other details.
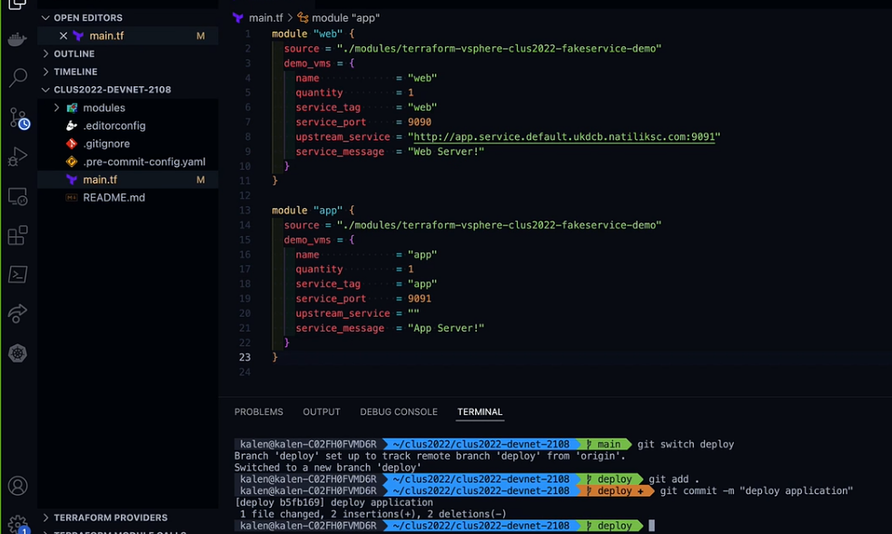
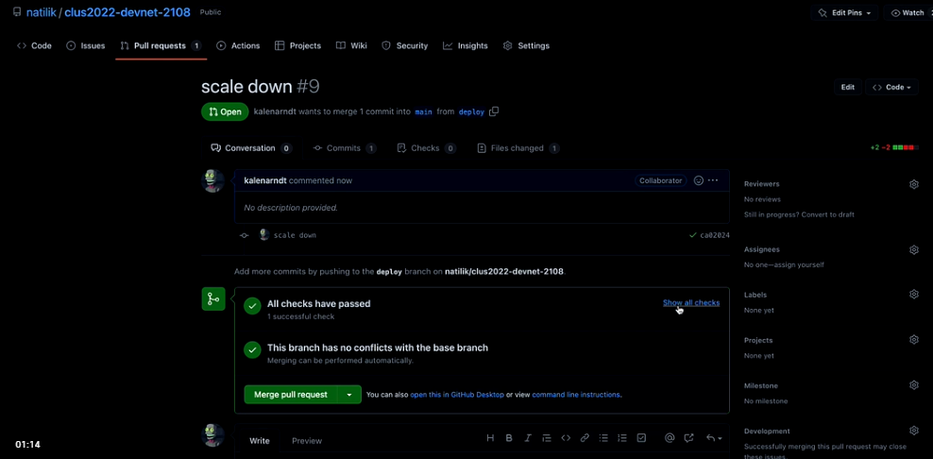
Once you push the code into GitHub, you need to create a pull request for the repo on GitHub.
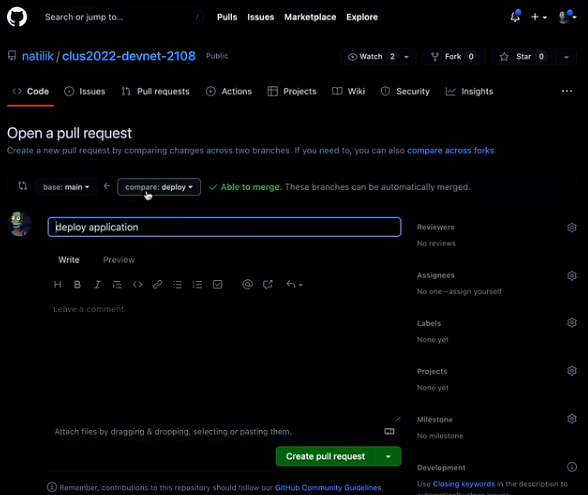
What you are going to do in this step, is the validation of the code.
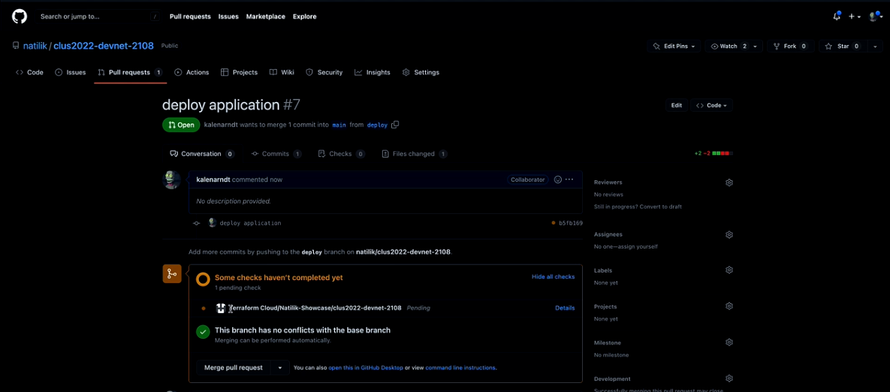
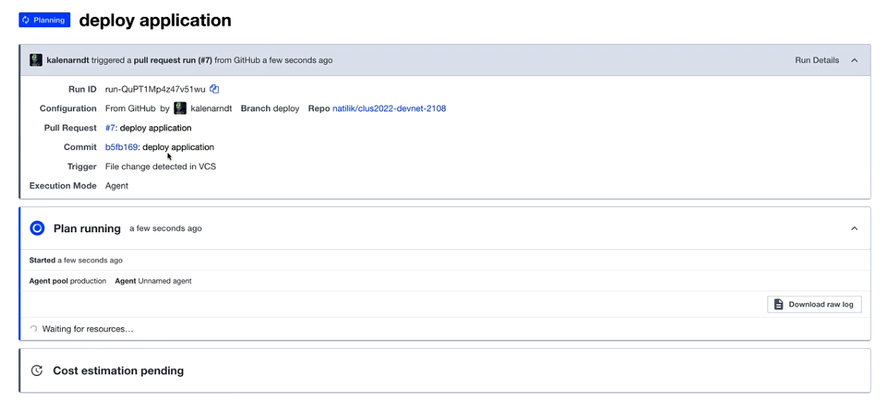
As GitHub is integrated with Terraform, we can see the log where two virtual machines with name App and Web are being created.
Once done on GitHub, we can see the output as shown below.
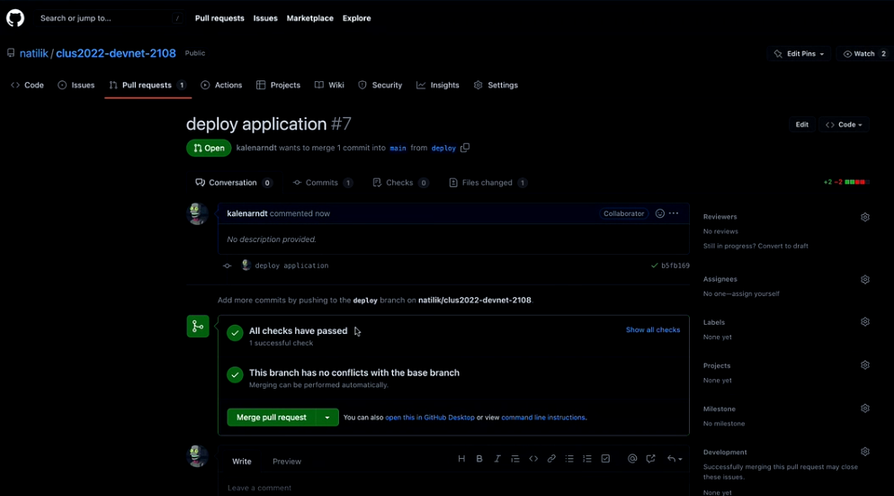
Let’s click on ‘Merge pull request’ and merge the repo to the main folder
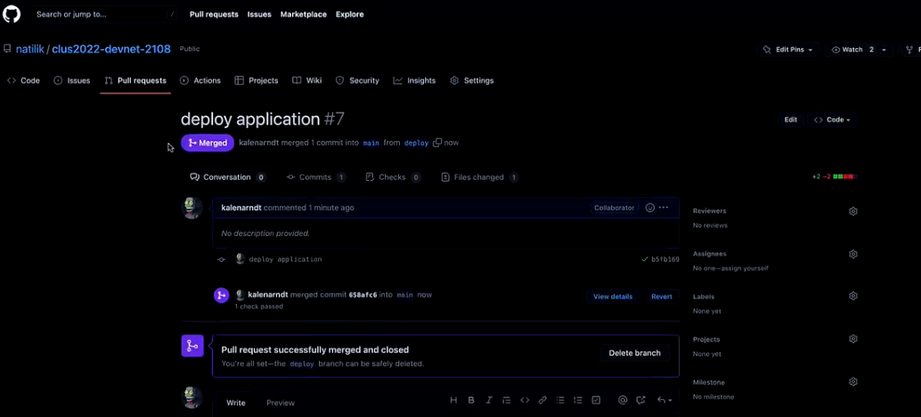
Please note, for this lab the workspaces were created manually.
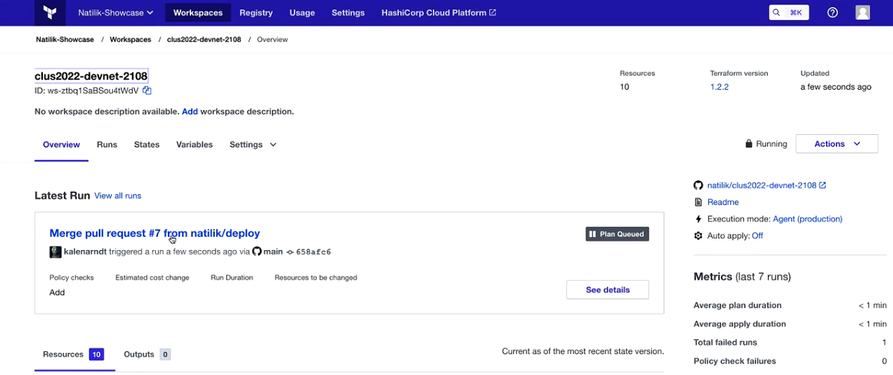
So, you need to click confirm and apply button once the planning is finished.

Now what happens is this will be powering two virtual machines and getting it customized.
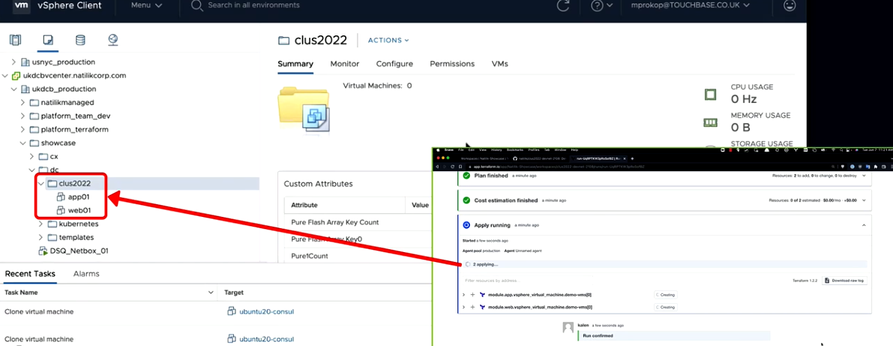
In summary, what happened was the code, which has been pushed to a GitHub repo that is integrated with Terraform, after detecting the changes, validated and deployed the code, creating two virtual machines as expected.
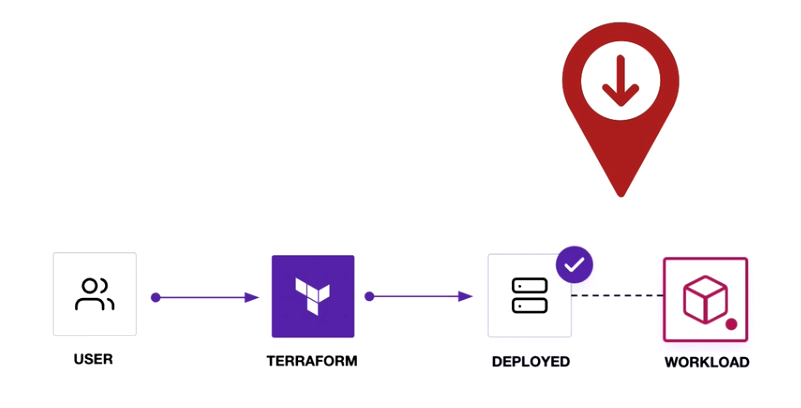
This will bring the agents online and register the services. You can verify it the Consul Dashboard.
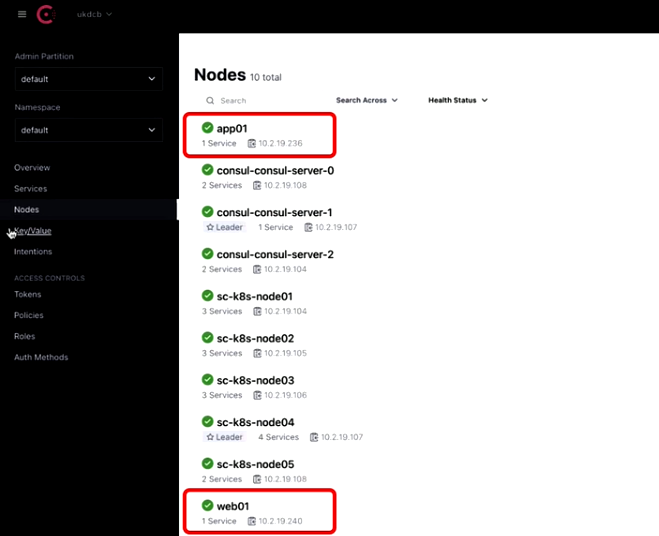
By clicking and digging deeper you may find the IP address.
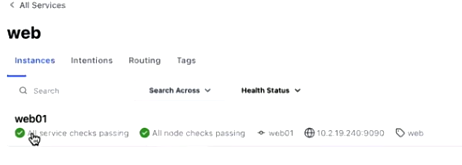
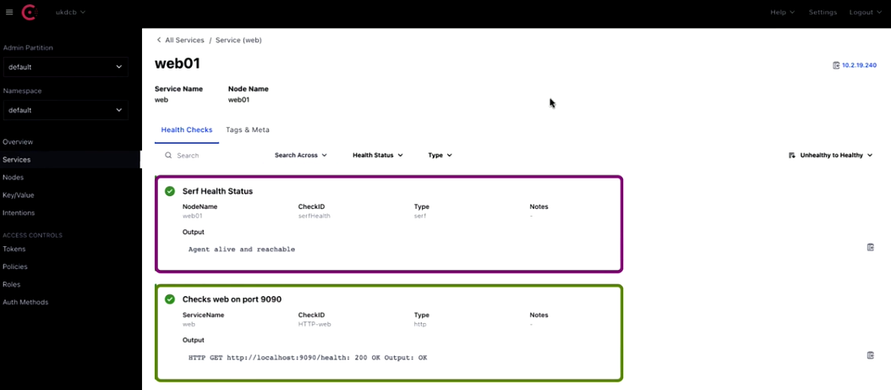
Status, below, which shows the Health Checks
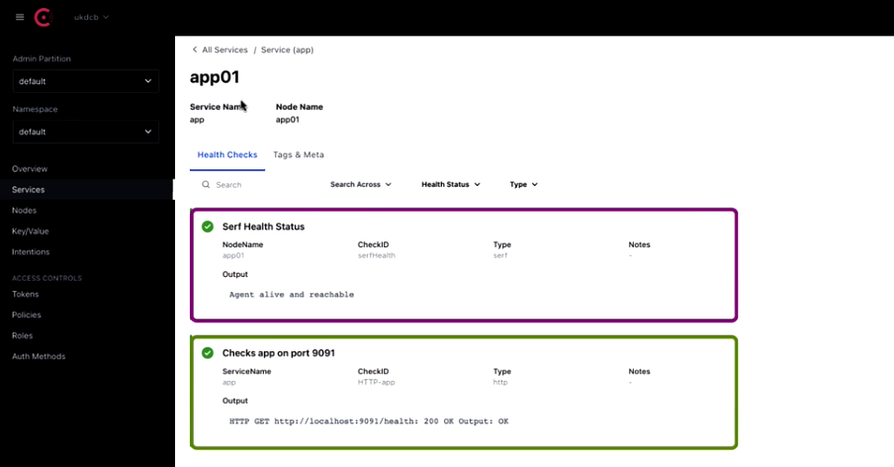
The same applies for the application named ‘app’. We can find the IP address assigned.

The Health Check status:
At this point you have the workloads online and they have registered with Consul.

Next let’s dive into the Terraform-Consul sync.

Here you have the workspace named Consul-Terraform-Sync:

Once you click and navigate to the page as shown below:
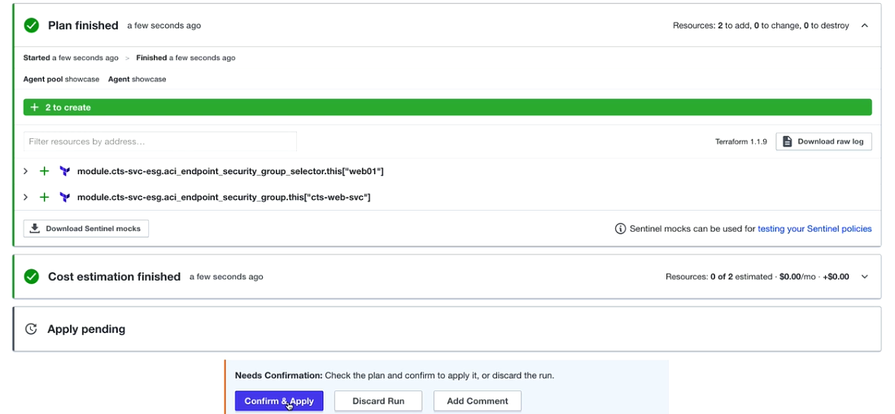
You need to click on the button “Confirm & Apply” where it will create an Endpoint Security Group for Web hitting the APIC.
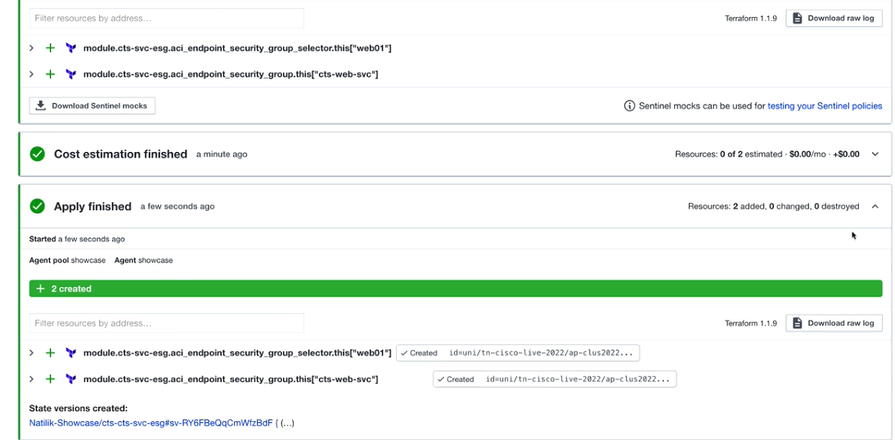
This step will have the Consul-Terraform-Sync to act on the workload. Followed by Terraform execution on what needs to be done as mentioned in the script.

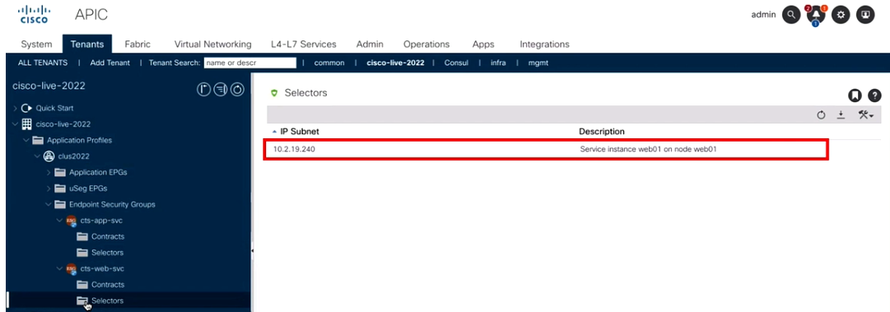
To verify, you can check the APIC and see that you got two Endpoint Security Groups created.
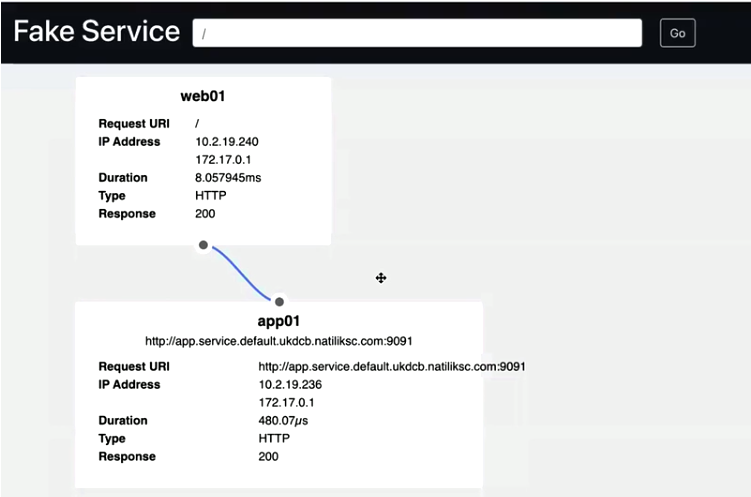
Go to the browser and type the IP address assigned from the Consul Dashboard.

You can see below
By this, you have now reached the success criteria for the deployment.

The benefit of using this Consul-Terraform-Sync tool is that if you make any changes in the quantity of servers, you don’t need to make any changes in the configuration. Let’s see as an example if any changes happen, how it’s going to be reflected.

In this scenario you are going to make changes in the Quantity of the servers.
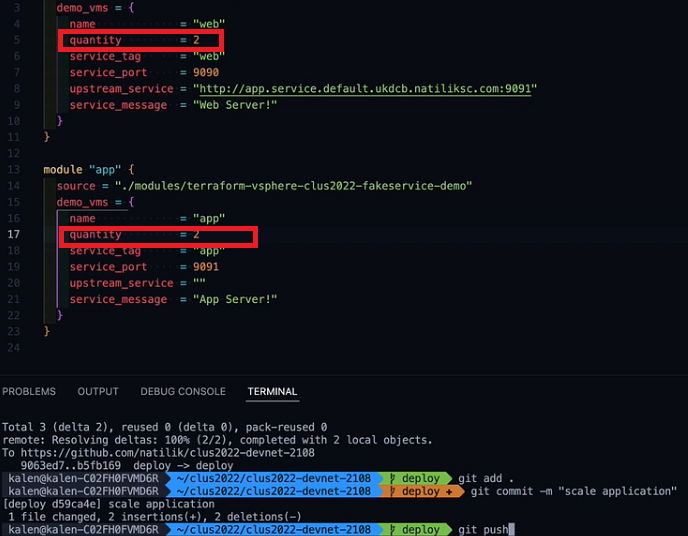
On GitHub, as you have done before, Merge pull Request.
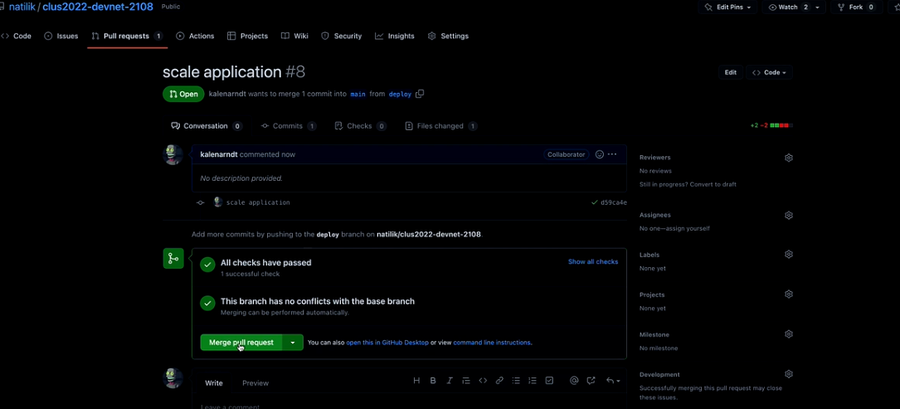
And then merge it to Main.
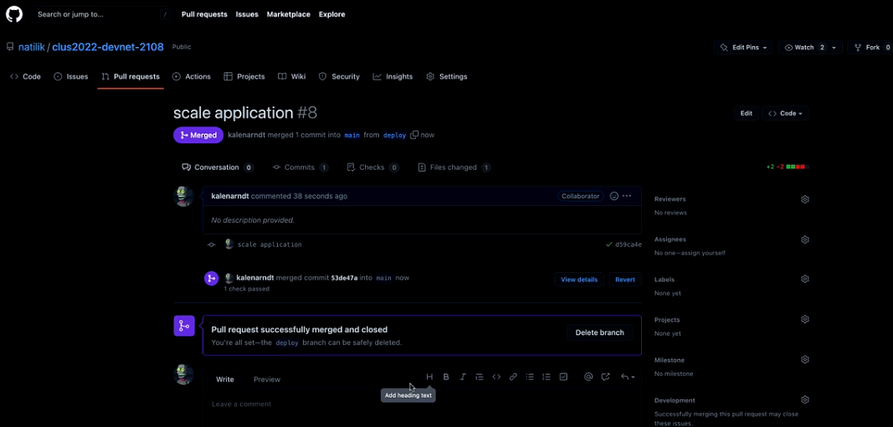
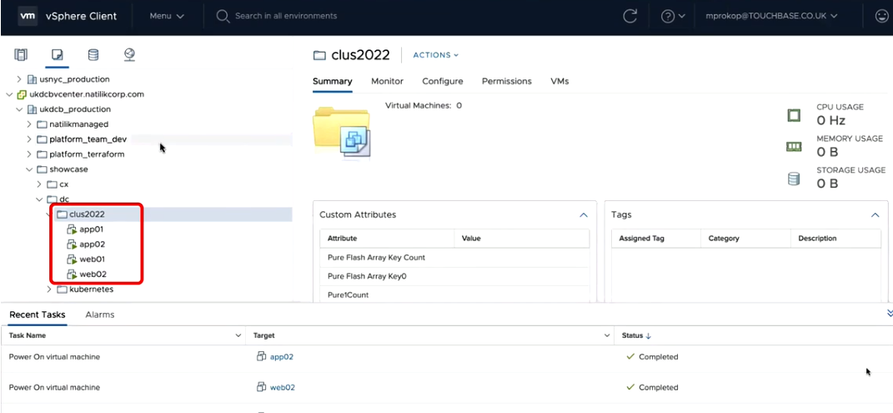
Now you will be able to see that two additional Virtual machines were created.
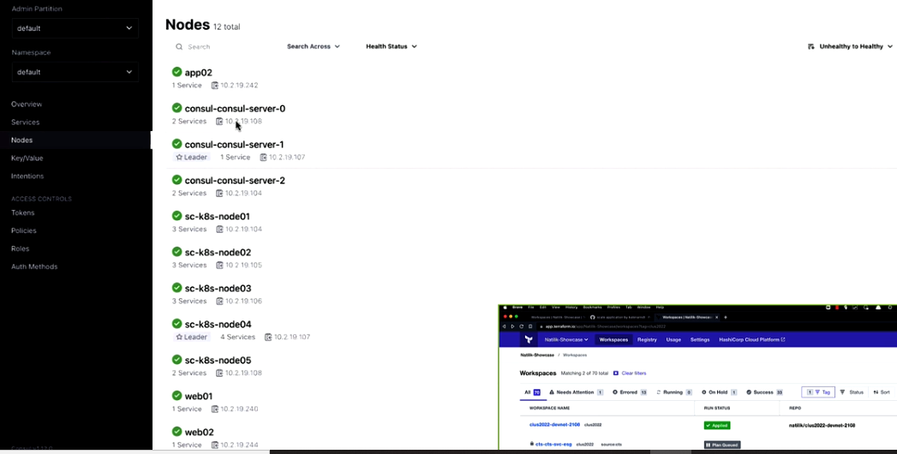
At the same time, on Consul Dashboard, you will be seeing two new instances, namely app02 and web02.
Your next task is to run the Consul-Terraform-Sync. By this, you are creating the 2 new objects (Endpoint security Groups) on ACI, based on the virtual machines that got deployed.
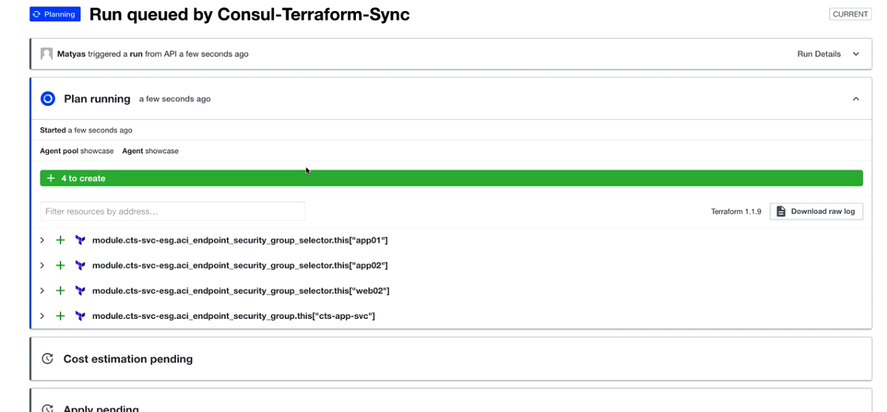

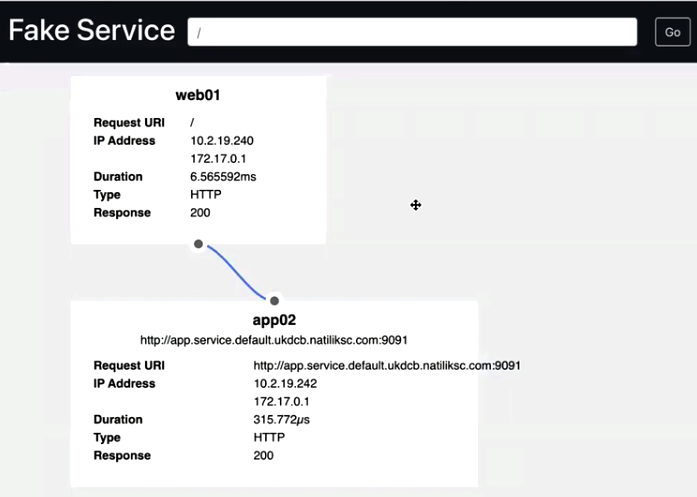
Once applied, navigate to the browser and check if you can hit the second application without doing any changes.
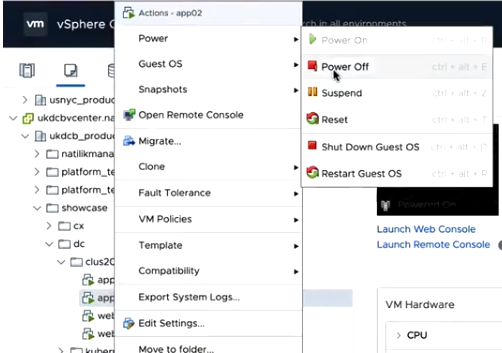
Next use case is if some services failed what will happen. Let’s demonstrate it by stopping App02:
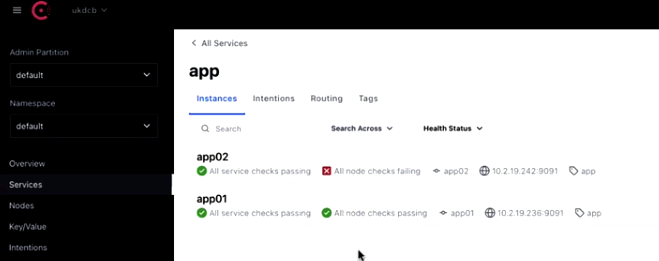
On the Consul window, you can see that the Node check is failing.
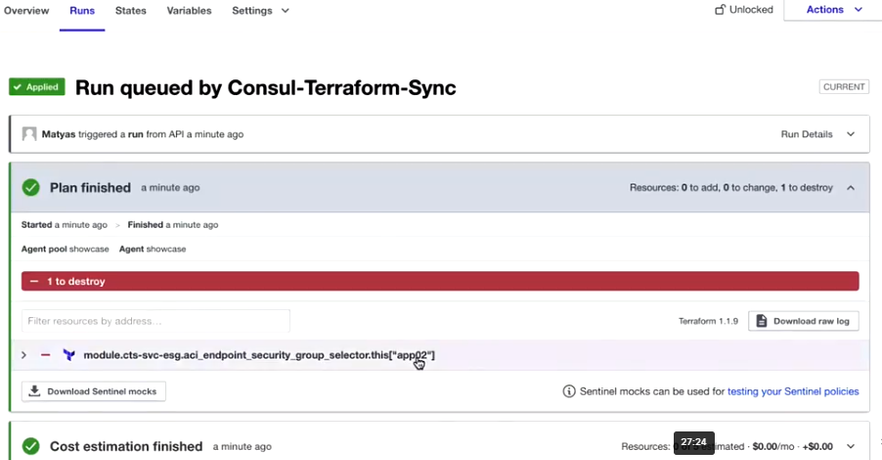
Also, on ACI, when you check the individual selectors, you won’t be seeing App02 because Consul is not going to serve an unhealthy instance to any other application (ACI) or to a user that needs it.
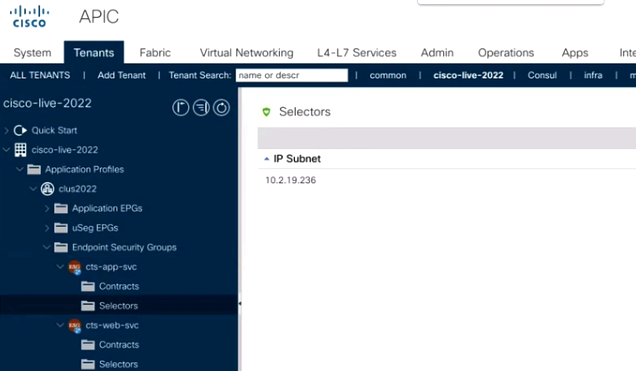
On the Terraform interface you can see that the Consul-Terraform-Sync had removed that selector.
Next, by entering 0 as quantity and pushing the code you can remove all the Objects which were created for the demo.
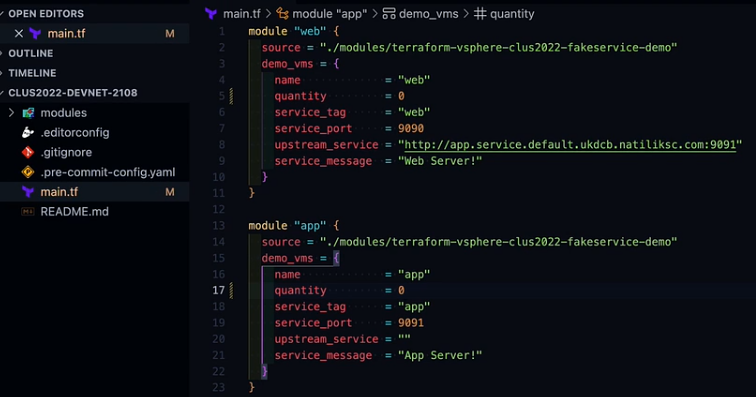
Remove all four virtual machines.
If you are going to check out the plan on Terraform, you will be seeing the page as shown below.
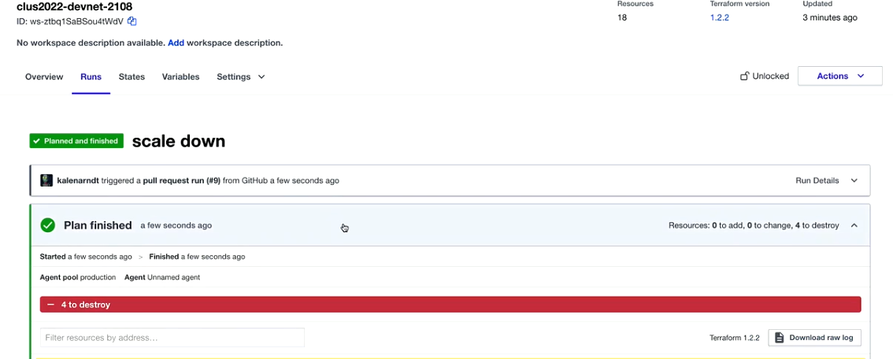
Next, by clicking and applying the plan, you can see that the scale down happened gracefully.
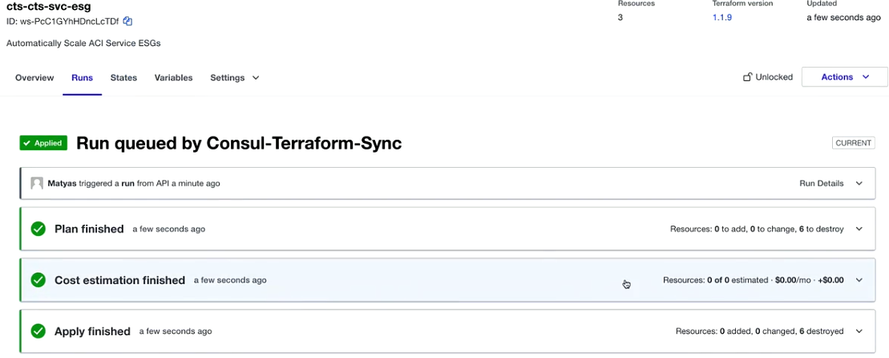
For this lab, six resources were removed, which includes 3 app servers and 3 Endpoint Security Groups.
Summary
With Consul-Terraform-Sync, you will not need human involvement. The provisioning time will take less that 150 Sec. You can also do Automatic clean up.

Credit: Cisco live presentation – “Delivering self-service with Cisco ACI and HashiCorp - DEVNET-2108”
References
Learn how to use Consul-Terraform-Sync to Automatically Provision Infrastructure - DevNet Snack Minute, Ep 57.
https://www.youtube.com/watch?v=sy6ujGTA5zA
Consul-Terraform-Sync (CTS) - Cisco Blogs
Find answers to your questions by entering keywords or phrases in the Search bar above. New here? Use these resources to familiarize yourself with the community:
New to DevOps? These resources can help:
